
Lighting Guides & Tips
How to Hang a Ceiling Light: A Step-by-Step Guide
Installing a ceiling light might feel intimidating at first, especially if you’re not used to working with electrical fixtures. However, learning how to hang a ceiling light is one of the most rewarding DIY projects for homeowners. Not only does it instantly upgrade the look of your space, but it can also improve functionality and ambiance.

Whether you want to add a pendant light above your dining table, replace an old chandelier in the living room, or simply brighten up your hallway, the process is easier than most people think when you follow the right steps. By the end of this guide, you’ll understand exactly what tools to use, how to prepare, and the safe way to complete your installation.
If you’re comfortable using basic hand tools and following safety guidelines, this project can usually be completed in under an hour. For a complete walkthrough – from turning off the power to securing the fixture correctly – be sure to read our How to Install a Light Fixture guide before getting started.
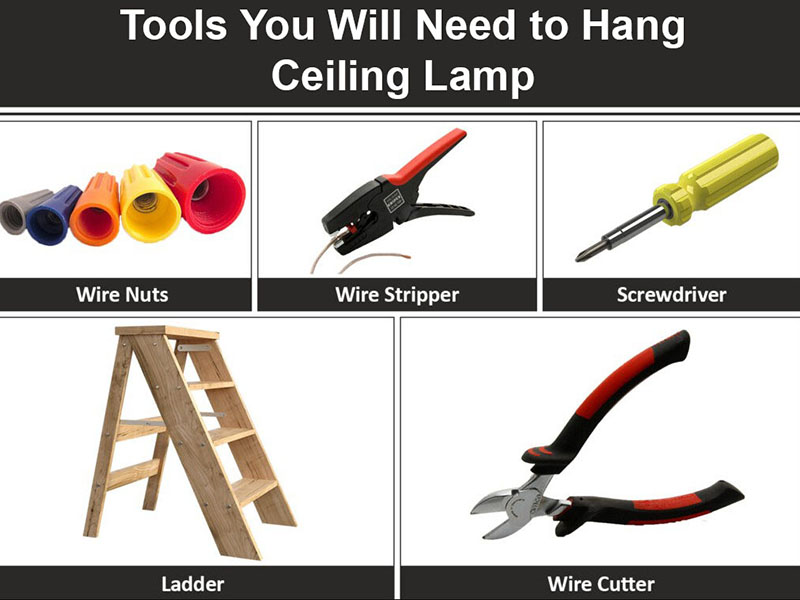
Tools You Will Need to Hang Ceiling Lamp
Before you start, make sure you have everything ready. Having the proper tools and materials not only makes the job smoother but also ensures your ceiling light is safely and securely installed.
Here’s a checklist of what you’ll need:
- Screwdrivers (Flathead & Phillips) – For removing the old fixture and securing the new one.
- Drill and Drill Bits – Useful if you need to make new holes in the ceiling.
- Wire Strippers & Pliers – Essential for handling electrical connections.
- Voltage Tester – To make sure the power is completely off before you start.
- Mounting Bracket – Usually comes with the light fixture.
- Wire Nuts / Connectors – For securing the electrical wires together.
- Measuring Tape – To mark the exact position on the ceiling.
- Ladder or Step Stool – To safely reach the ceiling.
- Protective Gear – Gloves and safety glasses for extra protection.
- The New Ceiling Light Fixture – Make sure it fits your room size and décor style.
💡 Pro Tip: Double-check that the fixture you purchased includes all the mounting hardware (screws, canopy, brackets). Missing parts are a common issue that delays installation.
Understanding Ceiling Types and Light Fixtures
Before you start drilling holes or connecting wires, it’s important to understand both the type of ceiling you have and the kind of light fixture you’re installing. Different ceilings and fixtures require slightly different installation methods.
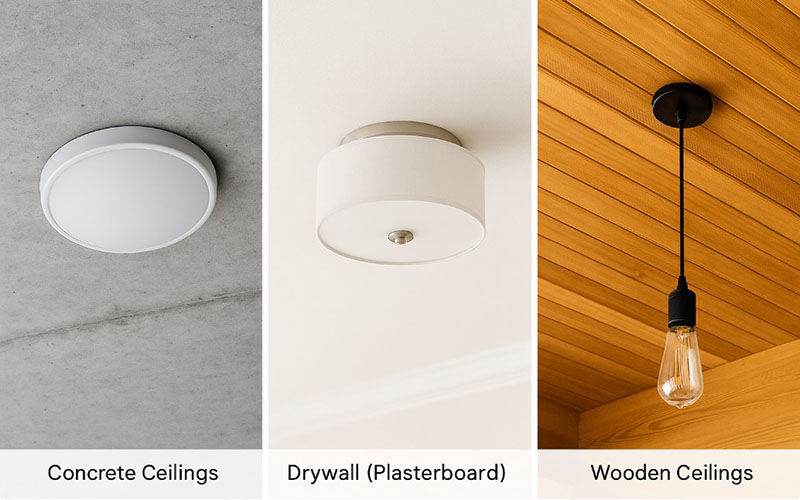
Ceiling Types
- Concrete Ceilings – Very sturdy but harder to drill. You’ll need a power drill with masonry bits and heavy-duty anchors.
- Drywall (Plasterboard) Ceilings – The most common in modern homes. Use a ceiling electrical box mounted between joists to support the weight of the fixture.
- Wooden Ceilings – Easier to screw into, but you must ensure the electrical box is properly secured to avoid fire hazards.
Fixture Types
- Flush Mount Lights – Installed close to the ceiling, ideal for hallways, bedrooms, or low-ceiling rooms.
- Semi-Flush Mount Lights – Hang slightly lower than flush mounts, offering more decorative style while still being practical.
- Pendant Lights – Single hanging lights, perfect for dining areas, kitchen islands, or entryways.
- Chandeliers – Multi-arm fixtures, often heavier, best for dining rooms or living rooms with higher ceilings.
- Track Lighting – Adjustable fixtures that provide directional light, great for kitchens, offices, or highlighting artwork.
💡 Pro Tip: Always check the weight rating of your ceiling electrical box. Heavier fixtures like chandeliers may require a reinforced box specifically designed to hold additional weight.
To see real examples of these fixture types in action, explore our curated lighting collection and discover which styles work best for your space.
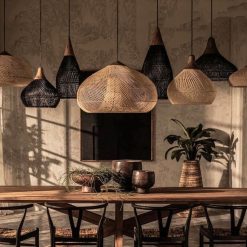

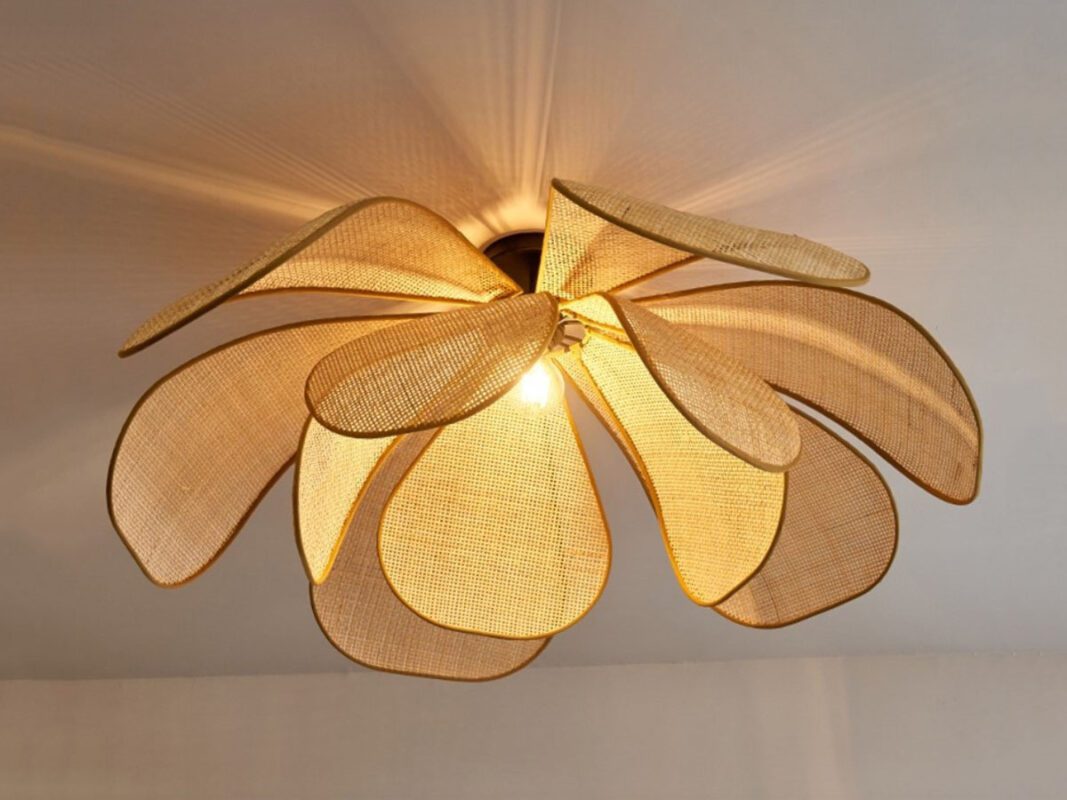
Rattan Pendant Light
Vintage Rattan Pendant Light Fixture High Quality Lamp Shades
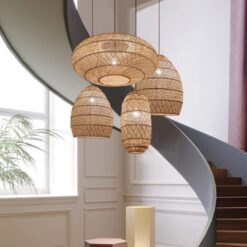

Rattan Pendant Light


Rattan Pendant Light

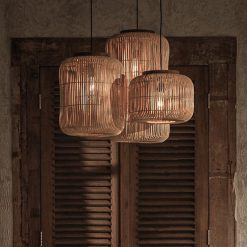
Rattan Pendant Light
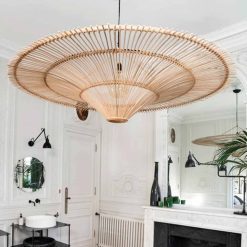

Rattan Pendant Light
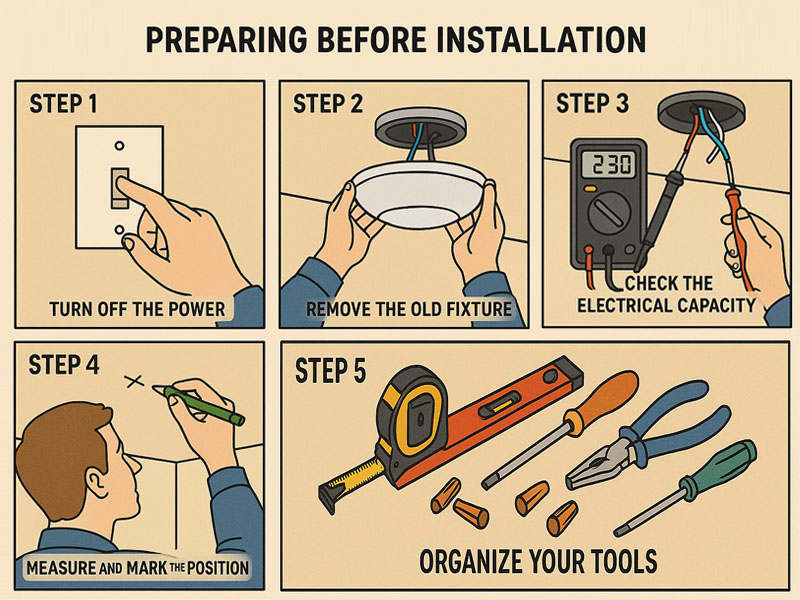
Preparing Before Installation
Preparation is the key to a safe and smooth installation. Rushing into the process without proper planning can lead to mistakes, safety risks, or poorly positioned lighting.
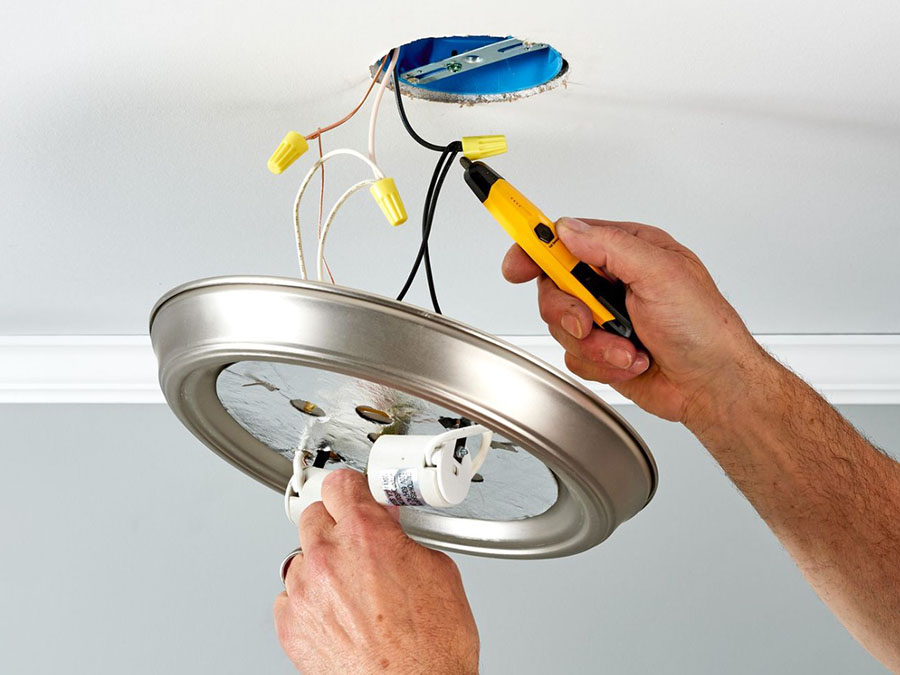
Step 1: Turn Off the Power
Go to your home’s breaker panel and shut off the power to the circuit where you’ll be working. Use a voltage tester on the existing fixture to confirm no electricity is flowing.
Step 2: Remove the Old Fixture (if applicable)
- Unscrew the old light cover and bulbs.
- Disconnect the wires carefully and remove the mounting bracket.
- Inspect the ceiling electrical box to ensure it’s still in good condition.
Step 3: Check the Electrical Capacity
- Make sure the electrical box can handle the new fixture’s wattage and weight.
- If you’re installing a heavy chandelier, consider upgrading to a fan-rated or heavy-duty electrical box.
Step 4: Measure and Mark the Position
- For centered lighting (living room, bedroom), measure the middle of the room.
- For dining areas or kitchen islands, center the fixture above the table or island.
- Mark the ceiling spot with a pencil for accuracy.
Step 5: Organize Your Tools
Lay out all the tools and parts on a table or workbench. Having everything within reach saves time and reduces frustration during installation.
💡 Pro Tip: Take a quick photo of the wiring connections from your old fixture before removing it. This makes it easier to remember which wires connect where.
Safety First When Hanging a Ceiling Light
Working with electricity always comes with risks, so safety should be your top priority. Even if you’ve done small DIY projects before, never underestimate electrical work.
Key Safety Guidelines
- Turn Off the Power Completely – Flip the breaker switch for the circuit you’re working on and verify it’s off with a voltage tester.
- Use the Right Tools – Avoid makeshift solutions. Insulated screwdrivers, gloves, and a stable ladder are essential.
- Work in Good Lighting – Use a flashlight or portable work light to avoid mistakes in dim areas.
- Avoid Overloading Circuits – Check that the total wattage of the fixture and bulbs does not exceed the circuit’s rating.
- Secure the Ladder – Make sure your ladder is stable and on flat ground. If possible, have someone hold it steady.
- Don’t Work Alone if Possible – Having an extra set of hands makes lifting and wiring much safer.
⚠️ Important: If you notice damaged wires, outdated wiring (such as knob-and-tube), or sparks when removing the old fixture, stop immediately and call a licensed electrician.

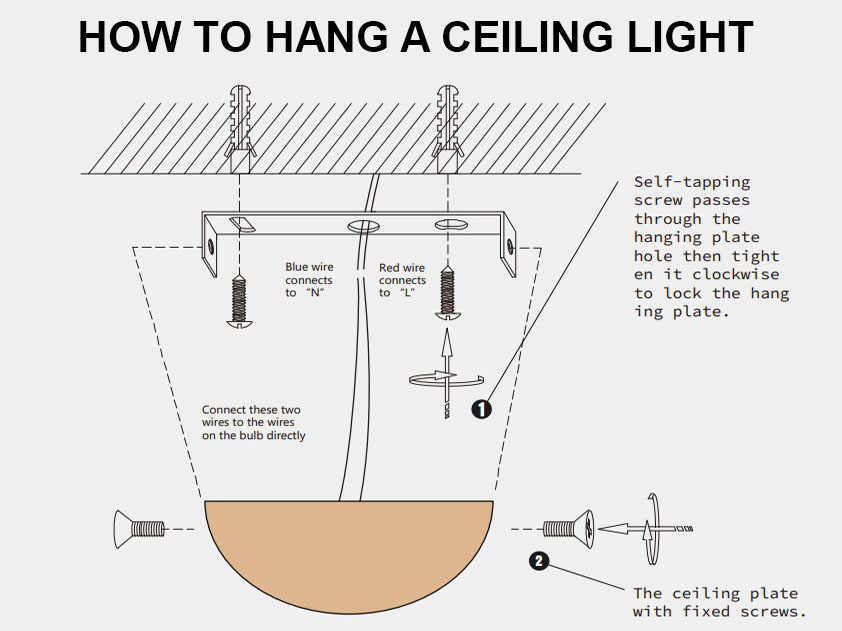
Wiring and Connection Options
Not all ceiling lights connect the same way. Understanding your options will help you choose the installation method that best suits your home and your comfort level.
1. Hardwired Installation
This is the most common method in permanent home lighting.
- Connect the black (hot) wire from the fixture to the black wire in the ceiling.
- Connect the white (neutral) wire from the fixture to the white ceiling wire.
- Connect the green or bare (ground) wire to the grounding screw or ground wire.
- Secure with wire nuts and electrical tape.
💡 Best for: Chandeliers, flush mounts, and permanent fixtures.
⚠️ Pro Tip: Always tuck the wires neatly back into the electrical box before attaching the fixture canopy.
2. Plug-In Pendant Lights
Some pendant lights are designed to simply plug into a wall outlet, eliminating the need for electrical wiring.
- Mount the hook or bracket to the ceiling.
- Hang the light and run the cord along the wall.
- Plug it into a nearby outlet.
💡 Best for: Renters or those who want flexible, non-permanent lighting solutions.
3. Using a Dimmer Switch or Smart Switch
For more control over brightness and energy savings, you can install a dimmer or smart switch:
- Dimmer Switch – Allows you to adjust brightness levels manually.
- Smart Switch – Connects to WiFi or smart home systems, letting you control lights by phone or voice assistant.
💡 Best for: Living rooms, bedrooms, and dining areas where ambiance matters.
⚠️ Note: Make sure your light fixture and bulbs are dimmable before connecting them to a dimmer switch. Using incompatible bulbs may cause flickering or buzzing.
Install a Ceiling Light Step-by-Step Guide
Now that you’re prepared with the right tools, safety steps, and knowledge of wiring options, let’s walk through the actual installation process.
Step 1: Shut Off Power
- Go to the breaker panel and turn off power to the room.
- Double-check with a voltage tester before touching any wires.
Step 2: Remove the Old Fixture
- Unscrew the fixture cover and bulbs.
- Disconnect the wires by unscrewing the wire nuts.
- Take down the mounting bracket and keep the electrical box accessible.
Step 3: Install the Mounting Bracket
- Most new fixtures come with a mounting plate or bracket.
- Attach the bracket securely to the ceiling electrical box with screws.
- Ensure it’s strong enough to hold the fixture’s weight.
Step 4: Connect the Wires
- Match the black (hot) to black, white (neutral) to white, and green/bare (ground) to the grounding screw.
- Use wire nuts and twist firmly until secure.
- Wrap electrical tape around the connections for added safety.
Step 5: Secure the Fixture
- Push the wires back into the electrical box carefully.
- Align the fixture canopy or base with the bracket and tighten screws.
- If it’s a pendant light, adjust the cord length before tightening.
Step 6: Add Bulbs and Test
- Screw in compatible bulbs (check wattage limit).
- Turn the breaker back on and test your light.
- If you installed a dimmer, test the dimming function to ensure smooth operation.
💡 Pro Tip: If your fixture wobbles after installation, check that the bracket screws are fully tightened and the electrical box is rated for ceiling fixtures.
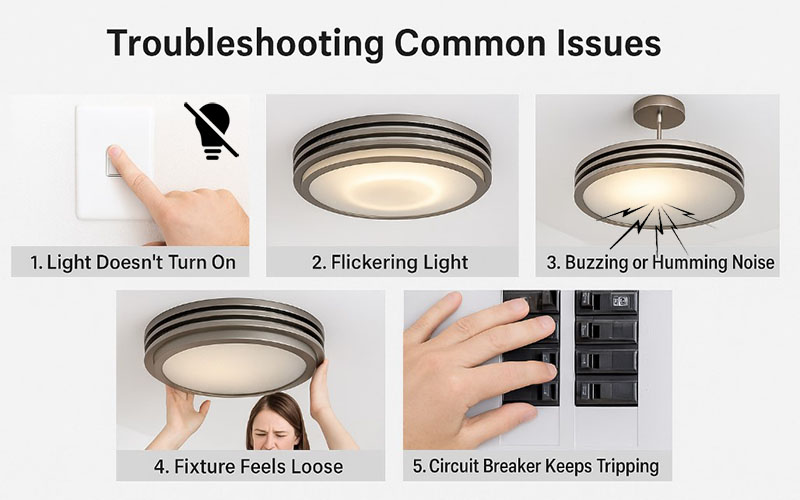
Troubleshooting Common Issues
Even when you follow instructions carefully, you may encounter small problems after installation. Here are the most common ones and how to fix them:
Problem 1: Light Doesn’t Turn On
- Cause: Power not fully restored, loose wire connection, or a tripped breaker.
- Fix: Double-check connections, replace the bulb, and confirm the breaker is on.
Problem 2: Flickering Light
- Cause: Loose bulb, incompatible dimmer, or poor wire connection.
- Fix: Tighten the bulb, ensure you’re using dimmable bulbs, and recheck wiring.
Problem 3: Buzzing or Humming Noise
- Cause: Incompatible bulbs with dimmers.
- Fix: Replace with LED-compatible dimmable bulbs.
Problem 4: Fixture Feels Loose
- Cause: Mounting bracket not secure or electrical box not strong enough.
- Fix: Reinforce with proper screws or upgrade to a heavy-duty electrical box.
Problem 5: Circuit Breaker Keeps Tripping
- Cause: Overloaded circuit or short circuit.
- Fix: Check wattage, reduce load on the circuit, or call an electrician if issue persists.
⚠️ Safety Reminder: If you notice sparks, burning smells, or hot wires, stop immediately and contact a licensed electrician.
Pro Tips for a Successful Installation
Learning the basic steps is essential, but a few extra tips can make the process smoother, safer, and more professional-looking.
- Read the Manufacturer’s Instructions – Every light fixture is slightly different. Always check the included guide before starting.
- Assemble the Fixture Before Going Up the Ladder – Pre-attach decorative parts, shades, or chains on a table to save time overhead.
- Use the Right Anchors – For heavy chandeliers or pendant lights, use ceiling joists or a reinforced electrical box.
- Mind the Ceiling Height – The bottom of a pendant light should hang about 30–36 inches above a dining table, and chandeliers should leave at least 7 feet of clearance in walkways.
- Label Wires If Unsure – When removing an old fixture, mark wires with tape to avoid confusion later.
- Have a Helper – Installing alone can be tricky, especially with large fixtures. A second person can hold the fixture while you connect the wires.
- Check Bulb Compatibility – Use energy-efficient LED bulbs where possible. They reduce heat, save electricity, and last longer.
💡 Pro Tip: Always hire a licensed electrician for complex jobs, such as relocating wiring or installing multiple fixtures on one circuit.
Time and Cost Considerations
Before starting, it’s good to know how long the project may take and what costs are involved. This helps set realistic expectations.
How Long Does It Take?
- Simple Replacement (Flush Mount or Pendant): About 30–60 minutes.
- Chandelier or Multi-Light Fixture: 1–2 hours, depending on weight and complexity.
- New Wiring or Moving Fixture Location: Several hours, often requiring professional help.
Cost of DIY Installation
- New Fixture: $50–$300+ depending on style and brand.
- Tools & Materials: $20–$50 if you already have basic tools.
- Total DIY Cost: Typically under $350 for most homeowners.
Cost of Professional Installation
- Electrician Fee: $100–$200 per fixture on average in the U.S.
- Complex Installs (heavy chandeliers, rewiring): $250–$500+.
- Total Professional Cost: Usually between $200–$600 depending on complexity.
💡 Pro Tip: If your ceiling is very high (over 12 feet), it’s safer and often more cost-effective to hire a professional with proper ladders and equipment.
When to Call a Professional Electrician
While many homeowners can safely handle replacing a simple light fixture, there are situations where hiring a licensed electrician is the safest choice. Attempting complex work without the proper training can lead to electrical hazards, code violations, or even fire risks.
Situations That Require Professional Help
- Old or Damaged Wiring – If your home has outdated knob-and-tube wiring or wires with frayed insulation.
- Relocating a Fixture – Moving a ceiling light to a new location often means running new wiring.
- Heavy Fixtures – Chandeliers and large pendants may exceed the weight your ceiling box can handle.
- High or Vaulted Ceilings – Professional equipment is needed to safely install lights at great heights.
- Circuit Breaker Issues – If breakers trip repeatedly or wires spark, call a pro immediately.
- Local Building Codes – In some areas, electrical work must be done by a licensed professional to meet regulations.

⚠️ Safety Reminder: Even if you’re confident in your DIY skills, never compromise on safety. Hiring a professional may cost more, but it ensures peace of mind and compliance with electrical standards.
Lighting Design and Décor Ideas
Installing a ceiling light isn’t just about functionality – it’s also about creating the right atmosphere and complementing your home’s style. The right fixture placement can transform an ordinary room into a warm, inviting space.
Match with Interior Styles
- Modern & Minimalist – Choose sleek flush mounts or geometric pendants with clean lines.
- Farmhouse & Rustic – Opt for rattan, wood, or wrought iron chandeliers with warm-toned bulbs.
- Japandi & Scandinavian – Natural textures like bamboo lights or rattan pendants paired with soft neutral colors.
- Traditional & Classic – Elegant chandeliers with crystal accents for dining rooms or entryways.
Layering Light for Better Ambiance
- Use pendants or chandeliers as the main focal point.
- Add wall sconces or floor lamps for accent lighting.
- Incorporate dimmer switches to control brightness based on mood.
- For kitchens or work areas, pair ceiling lights with under-cabinet lighting for better task illumination.
💡 Pro Tip: A ceiling light should complement – not overpower – the room. Always consider room size, ceiling height, and furniture placement when choosing your fixture.
Conclusion: Final Thoughts on Ceiling Light Installation
Learning how to hang a ceiling light is a practical skill that brings immediate benefits to your home. With the right tools, preparation, and safety precautions, most homeowners can successfully install or replace a fixture in less than an hour. From simple flush mounts to elegant chandeliers, a well-placed ceiling light can completely transform the look and feel of any room.
While many installations are DIY-friendly, don’t hesitate to call a professional if you encounter old wiring, complex installations, or heavy fixtures. At the end of the day, safety and functionality should always come first.
Whether you’re refreshing a single room or upgrading your entire home, ceiling lights are one of the most impactful design choices you can make. Take your time, follow the steps carefully, and enjoy the satisfaction of creating a brighter, more stylish space.
✨ Ready to upgrade your home lighting? Discover our artisan-made rattan and bamboo ceiling lights at vietshopdesign.com. Handcrafted by Vietnamese artisans, eco-friendly, and designed with timeless elegance, our fixtures are the perfect blend of natural beauty and modern functionality. Explore the collection today and bring warmth, character, and style into your home.
FAQ – Frequently Asked Questions
Not always. If you’re replacing an existing fixture and the wiring is in good condition, most homeowners can handle it themselves. However, hire a licensed electrician if you encounter old or damaged wiring, or if you’re moving the fixture to a new location.
A standard ceiling electrical box usually supports fixtures up to 50 lbs. For heavy chandeliers or fans, you’ll need a reinforced or fan-rated box that can hold 75–150 lbs.
The general rule is 30–36 inches above the tabletop. This provides enough light for the space while keeping the fixture from blocking views.
Only if the fixture and bulbs are dimmable. Using a dimmer with non-dimmable bulbs can cause flickering, buzzing, or even damage.
For a simple flush mount or pendant, installation typically takes 30–60 minutes. More complex fixtures, such as large chandeliers, may take 1–2 hours or more.
Basic tools include screwdrivers, a voltage tester, wire strippers, pliers, a ladder, and wire nuts. Most fixtures also come with their own mounting brackets and hardware.
Yes, as long as you use a properly mounted electrical box attached to ceiling joists. Never hang a light fixture directly from drywall without proper support.
You may also like:


Unlock VIP Perks
Join as a priority member to receive gifts and be the first to access exclusive deals, our newest collections, and more...
Read more articles
25+ Best Outdoor Bamboo Pendant Lights for a Warm, Natural & Inviting Space
Outdoor bamboo pendant lighting transforms a pergola, patio, or covered garden dining space from a [...]
Jun
11 Best Organic Modern Rope Lighting Ideas for a Warm, Inviting Space
Wicker, hemp rope, jute, and water hyacinth bring the most authentically textural and the most [...]
Jun
25+ Trending Organic Modern Rattan Lights for a Cozy Living Space
The most beautifully designed organic modern interiors today are built not on safe pendant choices [...]
Jun
8 Organic Modern Rattan Dome Pendant Lights for a Soft, Natural Interior
The dome form is rattan’s most naturally generous and most softly organic pendant silhouette – [...]
Jun
9 Organic Modern Rattan Chandeliers for a Soft, Natural Interior
A rattan chandelier in an organic modern interior creates the most complete expression of what [...]
Jun
11 Organic Modern Brown Rattan Lights for a Warm, Earthy Home
Brown rattan brings the most warmly grounded and most gently earthy pendant tone to an [...]
May
15+ Organic Modern Black Rattan Lights for a Warm, Bold Home
Black rattan in an organic modern interior creates a precisely beautiful design tension – the [...]
May
12 Organic Modern Beige Rattan Lights for a Natural Interior
Beige rattan is the pendant material that organic modern design was made for – its [...]
May
25+ Organic Modern Bamboo Lights for a Soft, Natural Interior
Organic modern design lives at the most beautiful intersection of clean contemporary form and warm [...]
May
8 Best Organic Modern Wood Pendant Lights for a Warm, Natural Home
Wood pendant lighting brings a quality to an organic modern interior that no softer natural [...]
May
8 Modern Rustic Wood Lighting for a Warm, Architectural Interior
Wood pendant lighting belongs in a modern rustic interior the way exposed timber belongs in [...]
May
12 Modern Rustic Wicker Rope Pendant Lights for a Warm, Textural Interior
In a modern rustic interior built around exposed timber beams, rough stone walls, worn leather [...]
May
Explore our collections
Rattan Pendant Light
95 Products
Bamboo Pendant Light
38 Products
Fabric Pendant Light
41 Products
Wood Pendant Light
7 Products
Rope Pendant Light
14 Products
Rattan Wall Sconce
6 Products
Rattan Table Lamp
6 Products
Rattan Floor Lamp
9 Products