
Lighting Guides & Tips
How to Install a Dimmer Switch: A Complete Beginner’s Guide
If you’ve ever wished you could adjust the brightness of your lights to match your mood, then learning how to install a dimmer switch is the perfect solution. A dimmer switch lets you control the intensity of your lighting with just a simple twist, slide, or tap. Instead of being stuck with only “on” or “off,” you can create a warm, cozy atmosphere for a family dinner or bright, clear light for reading and working.
Homeowners across the U.S. are adding dimmer switches because they’re not only stylish but also practical. Dimmer installation can:
- Save energy by reducing electricity usage when lights aren’t at full brightness.
- Extend bulb lifespan, especially with LED-compatible dimmers.
- Upgrade your interior design, giving each room customizable ambiance.
This guide covers everything from preparation to step-by-step wiring, troubleshooting, and even smart dimmer options. If you’re also planning to upgrade your lighting, you may want to start with the basics – How to Install a Light Fixture – before learning how to install a dimmer switch.
Whether you’re looking up how to install dimmer, install a dimmer switch, or simply want to explore the basics of dimmer switch installation, you’ll find clear instructions and expert tips right here.
How Does a Dimmer Switch Work?
Before jumping into dimmer switch install, it’s helpful to understand how these devices actually work. A traditional light switch simply allows or cuts off the flow of electricity – on or off. A dimmer switch, however, adjusts the amount of electricity reaching the bulb, which lowers or increases brightness.
Types of Dimmer Switches
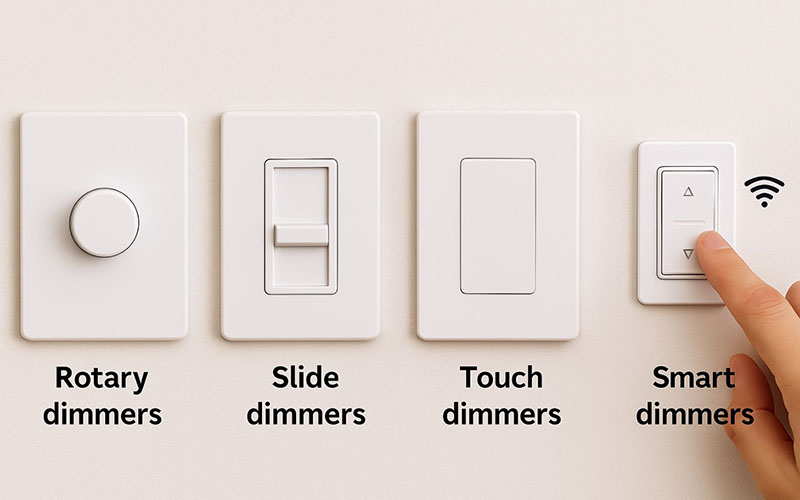
There are several styles available, each suited for different preferences and lighting setups:
- Rotary dimmers – The classic round knob you twist to adjust brightness.
- Slide dimmers – A vertical or horizontal slider that smoothly adjusts light levels.
- Touch dimmers – Flat panels you tap or hold for more modern convenience.
- Smart dimmers – WiFi- or app-enabled switches that let you control lighting with your phone or voice assistants like Alexa or Google Home.
Compatibility With Light Bulbs
Not all dimmers are created equal. An older dimmer designed for incandescent bulbs may not work properly with LEDs or CFLs, leading to flickering or buzzing. That’s why when planning dimmer switch installation, you should always check that your switch is rated for the type of bulbs you’re using. For most American households today, LED-compatible dimmers are the top choice.
By understanding how dimmers function, you’ll be more confident when deciding whether to add a dimmer switch, replace an old one, or even upgrade to smart lighting.
When Should You Add a Dimmer Switch?
Installing dimmer switches isn’t just about style – it’s about convenience, comfort, and even energy efficiency. Many homeowners wonder “Do I really need one?”. The answer is yes, especially if you want flexible lighting options that fit different occasions.
Popular Spaces for Dimmer Switch Installation
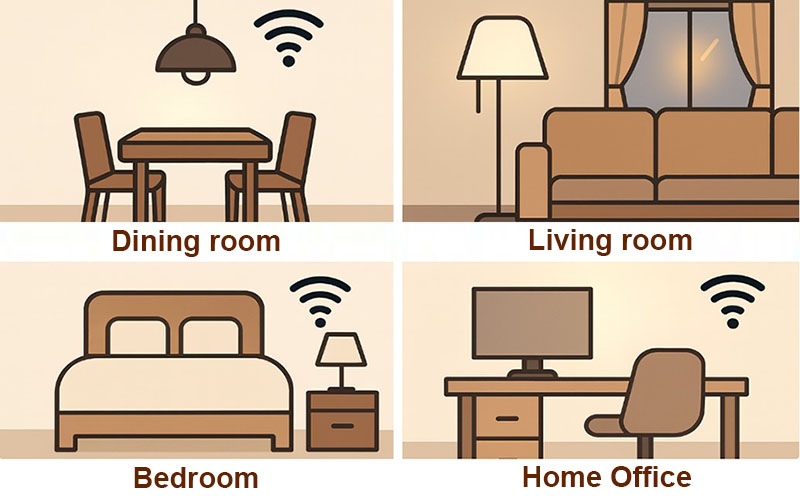
Here are some popular situations where you may want to add dimmer switch:
- Dining Rooms – Create an intimate and cozy setting for dinner parties by lowering the brightness, or keep it brighter for family meals.
- Living Rooms – Adjust the mood for movie nights, gatherings, or quiet reading sessions.
- Bedrooms – Use dim lighting to wind down before sleep, while still keeping the option for bright light when needed.
- Home Offices – Bright light for productivity during the day, softer light for a calming workspace in the evening.
- Hallways & Entryways – Reduce glare at night by dimming the lights to a comfortable glow.
If you’re searching for how to add a dimmer switch or how to add dimmer switch, the real question is: which room in your home could benefit from flexible lighting? Once you identify the right spot, the upgrade will make a noticeable difference in your everyday life.
The Perfect Pairing: Dimmer Switches and Different Types of Lighting
A dimmer switch works best when paired with the right kind of fixture. Different materials and designs respond uniquely to dimming, helping you craft the perfect mood for any space:
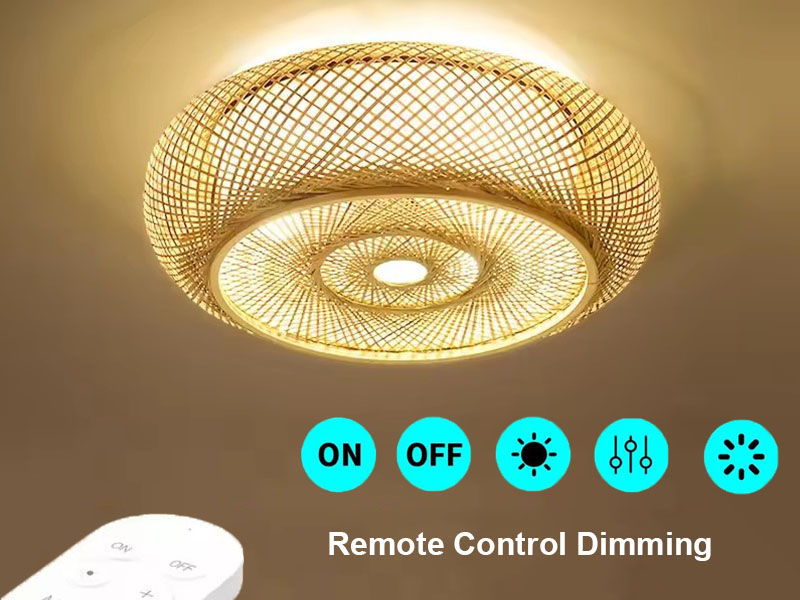
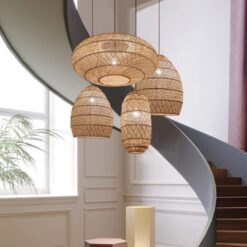
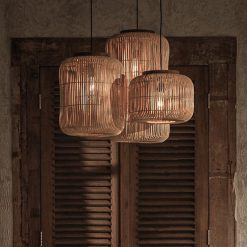
- Rattan pendant lights – Dimming enhances their warm, organic glow, adding natural charm to dining areas, bedrooms, or cozy living rooms.
- Fabric lamps – Perfect for living rooms and reading nooks, fabric shades soften brightness into a calming, ambient effect.
- Glass or crystal fixtures – When dimmed, they sparkle with elegance, making them ideal for formal dining or special occasions.
- LED fixtures – With LED-compatible dimmers, you can fine-tune brightness for working, relaxing, or saving energy.
By matching a dimmer switch with right light fixture you can transform ordinary rooms into adaptable, inviting spaces that shift seamlessly with your lifestyle.
Discover our rattan lighting collection, where natural materials and warm light come together to create inviting, lived-in spaces.


Rattan Pendant Light
Vintage Rattan Pendant Light Fixture High Quality Lamp Shades

Rattan Pendant Light


Rattan Pendant Light

Rattan Pendant Light


Rattan Pendant Light
Preparation Before Installing a Dimmer Switch
Before you dive into install dimmer switch or attempt any dimmer switch installation, a bit of preparation is crucial. A successful project starts with the right tools, materials, and safety steps.
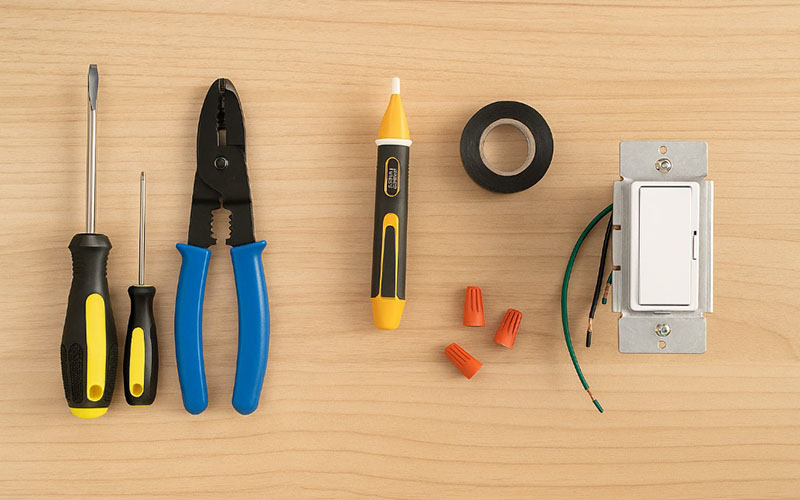
Tools and Materials You’ll Need
- Flathead and Phillips screwdrivers
- Wire cutters/strippers
- Voltage tester (to ensure power is off)
- Electrical tape
- The new dimmer switch (single-pole, 3-way, or smart dimmer, depending on your setup)
- Wire nuts for secure connections
Safety First
Electrical work always requires caution. Here are a few essential safety checks:
- Turn off the power at the circuit breaker before touching any wires.
- Use a voltage tester to double-check that no current is running through the wires.
- Read the manufacturer’s instructions on your dimmer, since wiring can vary slightly.
Choose the Right Dimmer
Not every dimmer works for every bulb or fixture. When preparing for dimmer switch install, pay attention to:
1. Bulb compatibility: Ensure your dimmer is designed for LEDs if you’re using them.
2. Load capacity: The dimmer should handle the total wattage of the bulbs it will control.
3. Switch type:
- Single-pole dimmer – controls one light from one location.
- 3-way dimmer – controls a light from two locations (like at the top and bottom of a staircase).
- Smart dimmer – adds wireless control and advanced features.
By completing this prep work, you’ll be ready for the hands-on part of the project – learning exactly how to put in a dimmer switch safely and efficiently.

Step-by-Step Guide: How to Install a Dimmer Switch
Now that you’ve prepared your tools and picked the right dimmer, let’s walk through how to install a dimmer switch safely. If you’ve been searching for guides on installing a dimmer switch, how to hook up a dimmer switch, or simply how to put in a dimmer switch, this step-by-step process covers it all.
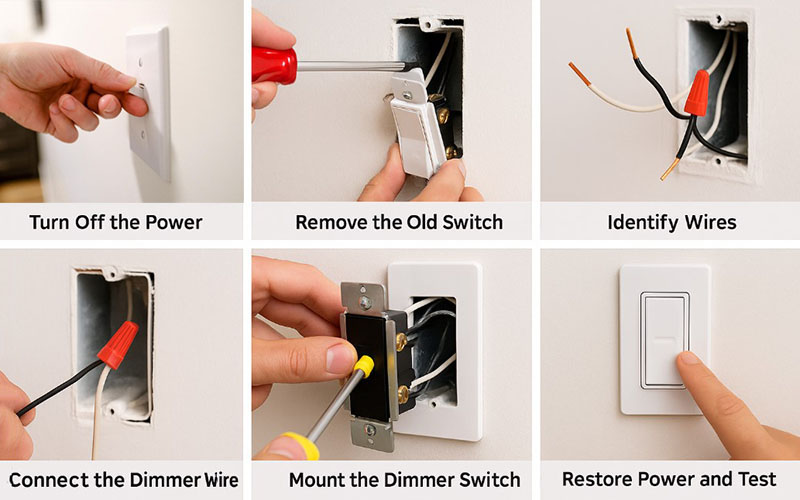
Step 1: Turn Off the Power
Go to your home’s breaker box and shut off the circuit powering the switch you’ll be replacing. Test with a voltage tester to confirm the electricity is off.
Step 2: Remove the Old Switch
Unscrew the faceplate and carefully pull the switch out of the electrical box. Disconnect the wires attached to it.
Step 3: Identify the Wires
Most setups will have:
- Hot wire (black) – carries power from the breaker.
- Load wire – sends power to the light.
- Ground wire (green or bare copper) – ensures safety.
- Neutral wire (white) – may be present, especially in modern homes or for smart dimmers.
Step 4: Connect the Dimmer Wires
Here’s how to hook up dimmer switch wires correctly:
- Attach the dimmer’s black wire to the hot wire.
- Connect the other dimmer lead to the load wire.
- Connect the ground wire to the grounding screw or wire.
- If your dimmer requires a neutral, connect it to the neutral wire in the box.
Secure connections with wire nuts and wrap with electrical tape for added safety.
Step 5: Mount the Dimmer Switch
Carefully tuck the wires back into the electrical box, then screw the dimmer switch into place. Attach the wall plate.
Step 6: Restore Power and Test
Turn the breaker back on and test your new dimmer. Slide, twist, or tap the control to confirm that the light adjusts smoothly.
By following these steps, you’ve successfully completed install dimmer switch at home. Whether you’re installing dimmer switches in multiple rooms or replacing just one, the process is very similar.
Wiring a Dimmer Switch Correctly
Wiring can feel intimidating, but understanding the basics makes the process easier. If you’re searching for how to connect a dimmer switch, how to wire a dimmer switch, or even how to wire a dimmer switch to a ceiling light, this section breaks it down clearly.
Single-Pole Dimmer Wiring
A single-pole dimmer controls one light from one location. To wire it:
- Connect the dimmer’s black lead to the hot (black) wire.
- Connect the dimmer’s red lead to the load (going to the light).
- Attach the ground to ground.
- Cap unused wires according to the manufacturer’s instructions.
This is the most common setup in American households.
Three-Way Dimmer Wiring
If you want to control the same light from two different switches (like at the top and bottom of stairs), you’ll need a 3-way dimmer. Wiring is slightly more complex:
- One wire connects to the common terminal.
- The other two wires connect to the traveler terminals.
- The ground connects as usual.
This allows either switch to turn the light on, off, or dimmed.
Wiring to a Ceiling Light
If your dimmer will control an overhead fixture, here’s how to wire a dimmer switch to a ceiling light:
- Connect the hot wire from the breaker to the dimmer.
- Connect the dimmer’s output to the ceiling light’s hot wire.
- Tie all neutrals together (if required).
- Ground everything securely.
Key Tips for Safe Wiring
- Always check the wiring diagram that comes with your dimmer switch.
- Never exceed the wattage rating of the dimmer.
- If your lights flicker or buzz after installation, you may need an LED-compatible dimmer.
Correct wiring ensures your dimmer switch installation works smoothly without hazards.
Rattan Pendant Light
Vintage Rattan Pendant Light Fixture High Quality Lamp Shades
Rattan Pendant Light
Rattan Pendant Light
Rattan Pendant Light
Rattan Pendant Light
How to Replace Dimmer Switch
Sometimes you don’t want to start from scratch – you just need to update an old or broken dimmer. Learning how to replace dimmer switch is simpler than a first-time installation, but you still need to follow proper steps.
When to Replace
- Your dimmer no longer adjusts brightness smoothly.
- The switch feels warm or makes buzzing noises.
- You upgraded to LED bulbs but the old dimmer isn’t compatible.
- You want to switch from a manual dimmer to a smart version.
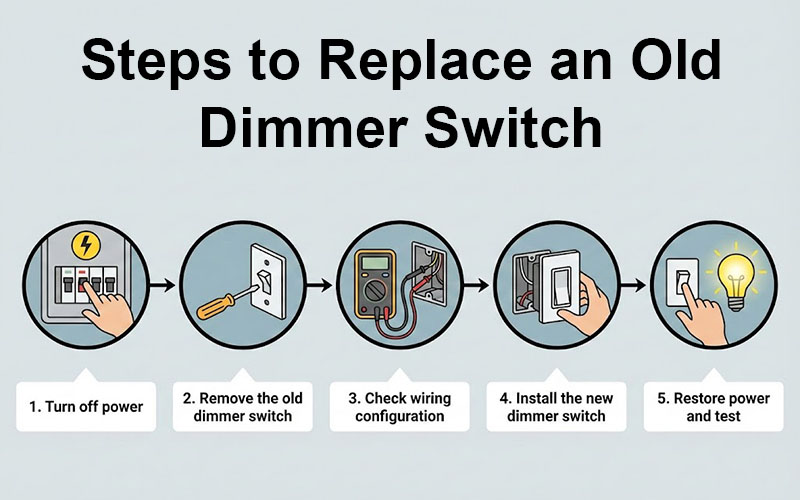
Steps to Replace an Old Dimmer
- Turn off power at the breaker.
- Remove the old dimmer switch by unscrewing the plate and disconnecting the wires.
- Check wiring configuration – single-pole or 3-way.
- Install the new dimmer switch following the same wiring connections.
- Restore power and test the new dimmer for smooth operation.
Replacing a dimmer is also a great opportunity to upgrade your home. Many homeowners search for dimmer switch installation guides not only to learn the basics but also to upgrade to smart dimmers that add modern convenience.
Troubleshooting Common Dimmer Switch Issues
Even with proper dimmer switch install, problems can arise. If your lights don’t work as expected after installation, here are common issues and fixes.
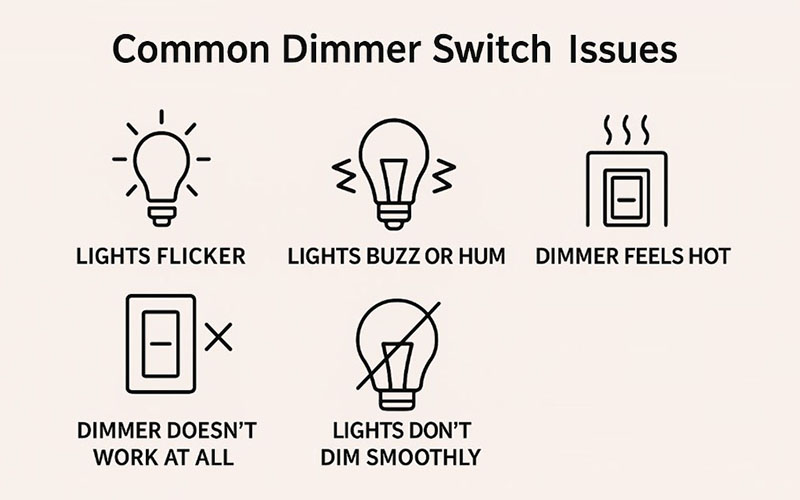
1. Lights Flicker
- Cause: Using a dimmer that isn’t LED-compatible.
- Fix: Replace with an LED-rated dimmer.
2. Lights Buzz or Hum
- Cause: Incompatible dimmer or overloaded wattage.
- Fix: Check the total wattage and switch to a higher-rated or compatible dimmer.
3. Dimmer Feels Hot
- Cause: Overloaded switch or loose wiring.
- Fix: Ensure total wattage doesn’t exceed dimmer’s capacity and double-check connections.
4. Dimmer Doesn’t Work at All
- Cause: Incorrect wiring or neutral wire required but not connected.
- Fix: Recheck the wiring diagram and manufacturer’s instructions.
5. Lights Don’t Dim Smoothly
- Cause: Not all bulbs are dimmable.
- Fix: Use only dimmable LEDs or compatible bulbs.
By troubleshooting these issues, you’ll get the most out of your installing a dimmer switch project. If you’re still unsure, hiring a licensed electrician is always a safe choice.
Upgrading to Smart Dimmer Switches
If you’ve already mastered the basics of dimmer switch installation, the next step many homeowners consider is upgrading to a smart dimmer. Unlike traditional models, smart dimmers bring your home into the world of automation and remote control.
Why Choose a Smart Dimmer?
- App Control – Adjust brightness from your smartphone, whether you’re on the couch or away from home.
- Voice Commands – Integrate with Alexa, Google Home, or Apple HomeKit for hands-free control.
- Scheduling & Automation – Set lights to dim in the evening automatically or brighten in the morning.
- Energy Monitoring – Some smart dimmers track energy usage, helping you save money over time.
Dimmer Switches Installation Notes
The process of installing dimmer switches with smart features is similar to traditional dimmers, but most smart dimmers require a neutral wire. Always check your wiring setup before purchasing.
If you’re searching for guides like install a dimmer switch or how to hook up a dimmer switch, keep in mind that wiring a smart version often comes with app setup steps as well. But once connected, you’ll enjoy a modern, flexible, and energy-efficient lighting solution that elevates your lifestyle.
Frequently Asked Questions (FAQ)
Here are answers to the most common questions people in the U.S. ask when researching how to install a dimmer switch or dimmer switch install:
1. Can I install a dimmer switch myself?
Yes – many homeowners do their own dimmer switch installation. If you’re comfortable with basic DIY electrical projects and follow safety steps, it’s straightforward. However, if your wiring is complex, hiring a licensed electrician is recommended.
2. Do dimmer switches really save electricity?
Yes. By lowering brightness, you reduce the wattage being used. Over time, this can result in noticeable energy savings and extended bulb life.
3. Will a dimmer switch work with LED bulbs?
Only if both the dimmer and bulbs are compatible. Look for dimmable LED bulbs and LED-rated dimmer switches to avoid flickering or buzzing.
4. How to wire a dimmer switch if I have multiple lights?
The steps are similar to wiring one fixture, but make sure the total wattage of all bulbs doesn’t exceed your dimmer’s capacity. If controlling lights from two locations, consider a 3-way dimmer.
5. What’s the difference between connecting a dimmer and replacing one?
- How to connect a dimmer switch: For first-time installation, you’ll be wiring from scratch.
- How to replace dimmer switch: You’re swapping out an old unit with a new one, following the same wire setup.
6. Can I wire a dimmer switch to a ceiling light?
Yes, and many U.S. households do. The process of how to wire a dimmer switch to a ceiling light is nearly identical to wiring wall fixtures – just ensure compatibility and proper grounding.
7. Is it safe to install a dimmer in any room?
Yes, but avoid high-moisture areas like bathrooms unless you buy a model specifically rated for damp locations.
Conclusion
Learning how to install a dimmer switch is one of the easiest DIY upgrades you can make to your home. Not only does it add comfort and style, but it also saves energy and extends the life of your light bulbs. Whether you’ve been searching for how to install a dimmer, install dimmer switch, or even how to connect a dimmer switch, the process is straightforward when you follow the right steps.
From preparing your tools and choosing the correct type of dimmer, to wiring it safely and troubleshooting common issues, you now have a complete guide to handle dimmer switch installation with confidence. And if you’re ready to take your lighting to the next level, upgrading to a smart dimmer switch will give you modern convenience with app control, voice commands, and automated schedules.
If you’re comfortable working with basic electrical wiring, this is a project you can do in under an hour. But if you’re ever unsure, hiring a licensed electrician ensures safe and reliable results.
So go ahead – add dimmer switch to your dining room, bedroom, or living room and enjoy lighting that adjusts perfectly to your mood. It’s a small change that makes a big difference in your home.
You may also like:
- How to Install a Pendant Light: A Step by Step Guide
- How to Install a Wall Light: A Step by Step Guide


Unlock VIP Perks
Join as a priority member to receive gifts and be the first to access exclusive deals, our newest collections, and more...
Read more articles
25+ Best Outdoor Bamboo Pendant Lights for a Warm, Natural & Inviting Space
Outdoor bamboo pendant lighting transforms a pergola, patio, or covered garden dining space from a [...]
Jun
11 Best Organic Modern Rope Lighting Ideas for a Warm, Inviting Space
Wicker, hemp rope, jute, and water hyacinth bring the most authentically textural and the most [...]
Jun
25+ Trending Organic Modern Rattan Lights for a Cozy Living Space
The most beautifully designed organic modern interiors today are built not on safe pendant choices [...]
Jun
8 Organic Modern Rattan Dome Pendant Lights for a Soft, Natural Interior
The dome form is rattan’s most naturally generous and most softly organic pendant silhouette – [...]
Jun
9 Organic Modern Rattan Chandeliers for a Soft, Natural Interior
A rattan chandelier in an organic modern interior creates the most complete expression of what [...]
Jun
11 Organic Modern Brown Rattan Lights for a Warm, Earthy Home
Brown rattan brings the most warmly grounded and most gently earthy pendant tone to an [...]
May
15+ Organic Modern Black Rattan Lights for a Warm, Bold Home
Black rattan in an organic modern interior creates a precisely beautiful design tension – the [...]
May
12 Organic Modern Beige Rattan Lights for a Natural Interior
Beige rattan is the pendant material that organic modern design was made for – its [...]
May
25+ Organic Modern Bamboo Lights for a Soft, Natural Interior
Organic modern design lives at the most beautiful intersection of clean contemporary form and warm [...]
May
8 Best Organic Modern Wood Pendant Lights for a Warm, Natural Home
Wood pendant lighting brings a quality to an organic modern interior that no softer natural [...]
May
8 Modern Rustic Wood Lighting for a Warm, Architectural Interior
Wood pendant lighting belongs in a modern rustic interior the way exposed timber belongs in [...]
May
12 Modern Rustic Wicker Rope Pendant Lights for a Warm, Textural Interior
In a modern rustic interior built around exposed timber beams, rough stone walls, worn leather [...]
May
Explore our collections
Rattan Pendant Light
95 Products
Bamboo Pendant Light
38 Products
Fabric Pendant Light
41 Products
Wood Pendant Light
7 Products
Rope Pendant Light
14 Products
Rattan Wall Sconce
6 Products
Rattan Table Lamp
6 Products
Rattan Floor Lamp
9 Products