
Lighting Guides & Tips
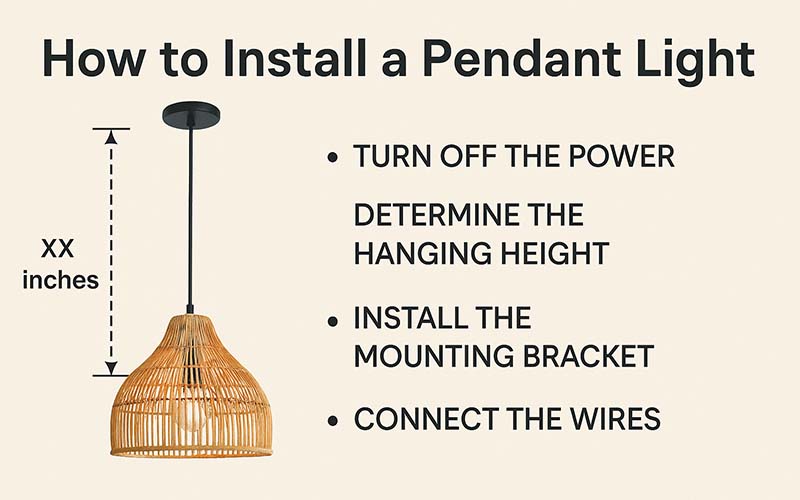
How to Install a Pendant Light: A Step by Step Guide
Pendant lights are one of the most stylish and functional ways to brighten up your home. Whether it’s above a kitchen island, over a dining table, or in your living room, pendant lights add both illumination and personality. Many homeowners wonder: “How do you install a pendant light?” The truth is, with the right preparation and a careful step-by-step approach, pendant light installation is a project you can handle yourself.
This guide will cover everything you need to know about how to install a pendant light fixture, from removing an old lamp to wiring, adjusting height, and safely testing your new fixture. We’ll also answer related questions such as how to hang a ceiling light, how to install hanging lights, and even how to hang a plug in pendant light if you prefer a simpler solution.
By following this comprehensive tutorial, you’ll learn not just how to connect a pendant light correctly, but also the recommended hanging heights for different rooms, common mistakes to avoid, and troubleshooting tips. Whether you’re replacing an outdated fixture or adding a new statement piece, understanding how to replace a pendant light – and knowing when to follow a complete guide on how to install a light fixture – will ensure your space looks polished, safe, and perfectly lit.
Tools & Materials Needed
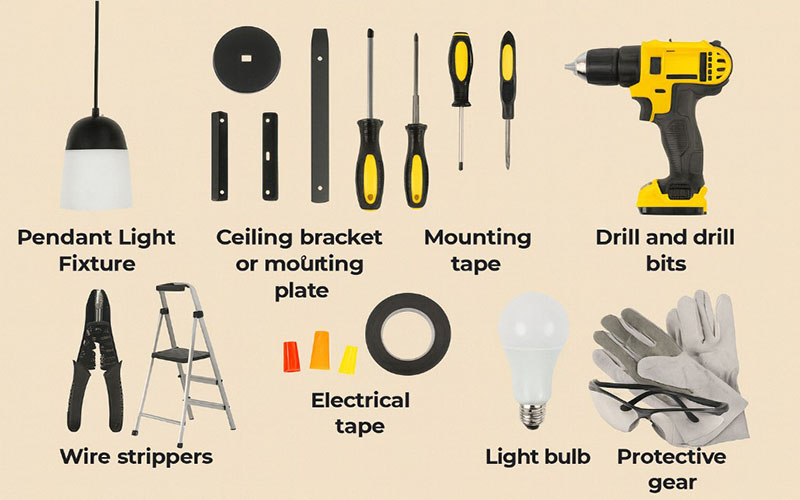
Before you begin your hanging light installation, it’s essential to gather the right tools and materials. Having everything on hand will make the process smoother and safer. Depending on your specific fixture and setup, you may not need every single item, but this checklist covers the most common requirements for a successful install pendant light fixture project:
- Pendant light fixture (the one you want to install or replace)
- Ceiling bracket or mounting plate (usually included with the light)
- Screwdrivers (both flathead and Phillips)
- Drill and drill bits (for new holes if necessary)
- Wire strippers (for preparing wire ends)
- Voltage tester (to ensure power is completely off before wiring)
- Electrical tape (for securing wire connections)
- Wire connectors (wire nuts) (to join fixture wires safely)
- Ladder (to reach the ceiling comfortably and safely)
- Light bulb(s) compatible with your fixture (LED recommended for efficiency)
- Safety gear: gloves and safety glasses
Tip: Always double-check that your ceiling junction box is rated to hold the weight of your new light. Heavy fixtures like chandeliers or industrial pendants require extra support, while lightweight designs like rattan pendant lights or fabric shades are easier to manage.
Having this checklist ready means you can focus on the installation process itself without interruptions – a must for safe and efficient pendant light installation.
Safety First: Preparing the Area
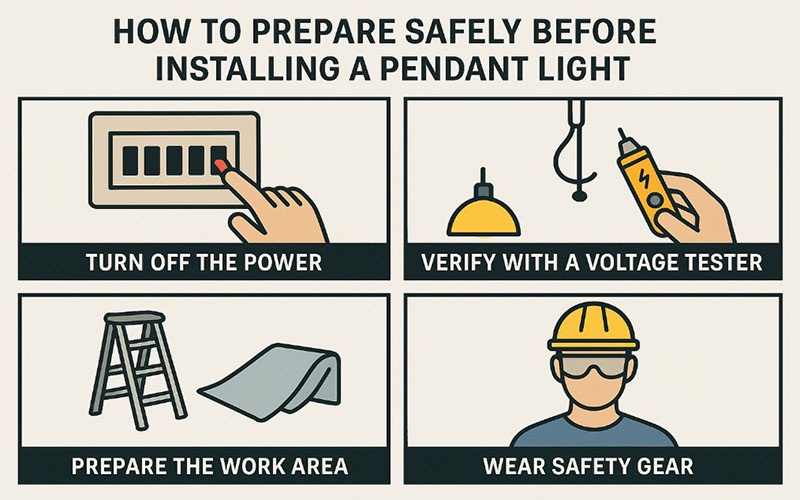
Before you begin any pendant light installation, safety must be your top priority. Working with electricity can be dangerous if proper steps aren’t followed. These precautions apply whether you’re learning how to hang a ceiling light, how to install a pendant light fixture, or even handling a simple plug-in model.
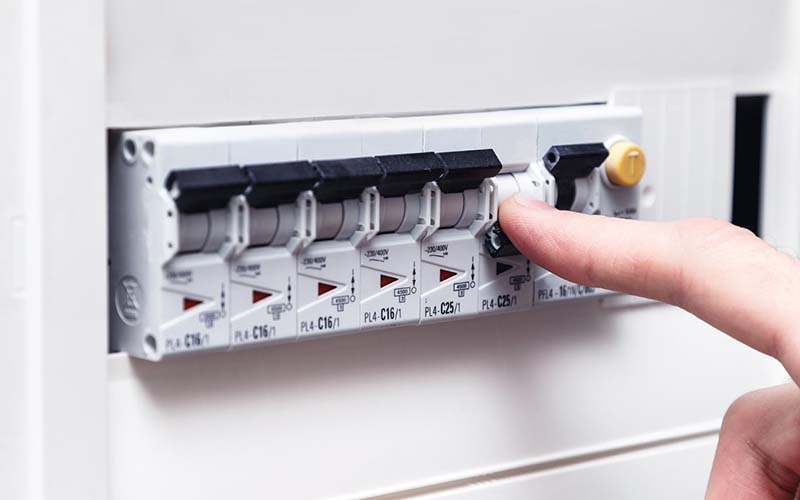
- Turn Off the Power
Go to your home’s circuit breaker and switch off the power to the room where you’ll be working. Do not rely on just flipping the wall switch – it’s not enough to guarantee safety. - Verify With a Voltage Tester
Use a voltage tester to confirm that the wires in the ceiling carry no electricity. This ensures a safe environment for your installation. - Prepare the Work Area
Move furniture out of the way, place a sturdy ladder under the installation spot, and make sure you have good lighting since the power will be off. - Wear Safety Gear
Use insulated gloves and protective glasses to prevent accidental shocks or debris falling in your eyes.
⚠️ Tip: If you’re not confident working with electrical wiring, it’s safer to hire a licensed electrician. Attempting hanging light installation without proper knowledge can lead to serious hazards.
Choose the Right Pendant Light for Your Space
Before installation, choosing the right pendant light helps ensure both visual balance and comfortable lighting. Consider the room size, ceiling height, and the function of the light – task lighting for kitchens, ambient lighting for dining or living spaces.
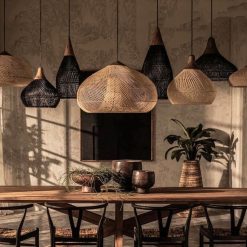
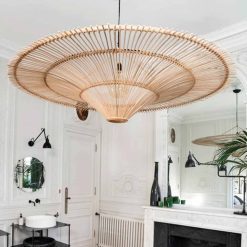
Material also matters. Bamboo and rattan pendant lights are lightweight, easy to install, and naturally soften light, creating a warm and inviting glow. Their woven textures work especially well in dining rooms, kitchen islands, and relaxed interiors inspired by Japandi, Wabi-Sabi, or coastal styles.
Finally, pair your pendant with the right bulb. Warm LED bulbs (2700K–3000K) and dimmable options enhance comfort and allow you to adjust the mood after installation.
❓ Not sure which light fits your space yet? Discover our rattan lighting collection for a warm, organic feel.
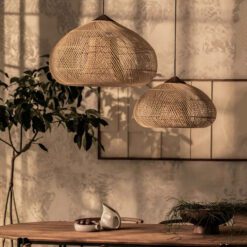
Rattan Pendant Light
Vintage Rattan Pendant Light Fixture High Quality Lamp Shades
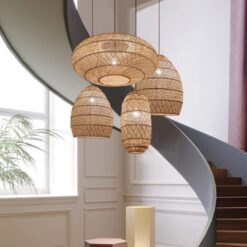

Rattan Pendant Light
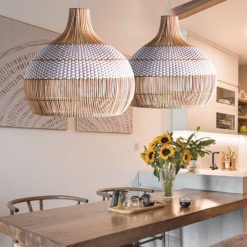

Rattan Pendant Light

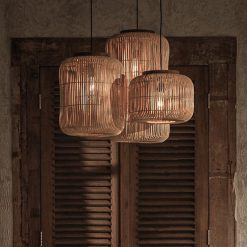
Rattan Pendant Light

Rattan Pendant Light
Step-by-Step Guide: How to Install a Pendant Light
This section provides a clear, step-by-step process for install pendant light fixture projects. Whether you’re looking at how to replace a pendant light or installing one for the first time, follow these instructions carefully.
1. Turn Off the Power
Reconfirm that the breaker is off before touching any wires. This is the golden rule of any electrical project, including how to install hanging lights or how to hang a ceiling light.
2. Remove the Existing Fixture (if applicable)
If you’re updating your décor or want to know how to change a pendant light, start here:
- Remove the light bulb and any decorative covers.
- Unscrew the old fixture from the ceiling bracket.
- Carefully disconnect the wires by loosening the wire nuts.
This step is crucial in how to replace a pendant light safely.
3. Install the Mounting Bracket (Ceiling Plate)
Most pendant lights come with a mounting bracket or ceiling plate:
- Attach the bracket to the junction box with the screws provided.
- Ensure it’s secure enough to support the weight of your new fixture.
- For lightweight fixtures like rattan pendants, the process is simpler, but heavier fixtures may need a reinforced box.
This is a key step in every install pendant light fixture process.
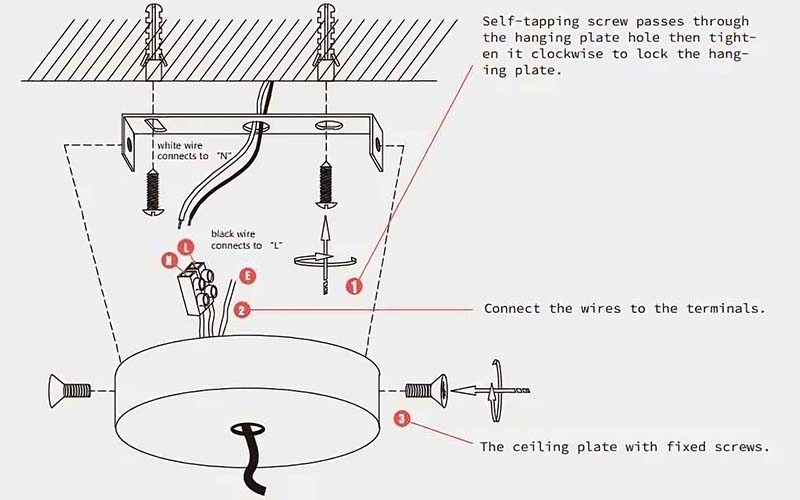
4. Connect the Wires
This is the most important part of hanging light installation. Knowing how to connect a pendant light correctly ensures safety and performance:
- Black (or red) wire = hot → connect to black wire in the ceiling.
- White wire = neutral → connect to white wire.
- Green or bare copper wire = ground → connect to the ground wire or grounding screw.
Secure connections with wire nuts, then wrap with electrical tape for extra protection.
5. Attach and Adjust the Pendant Light
Once the wiring is done:
- Attach the pendant light to the mounting bracket.
- Adjust the chain or cord to set your desired hanging height.
- Ensure the fixture is level before tightening screws.
This step answers many questions on how to install hanging lights neatly and professionally.
6. Install the Bulb and Cover
Insert a compatible bulb (LED recommended) and add any shades or covers that came with your fixture.
7. Restore Power and Test
- Turn the breaker back on.
- Test the wall switch to confirm the light works properly.
- If it doesn’t turn on, double-check your wiring connections and ensure the bulb is seated correctly.
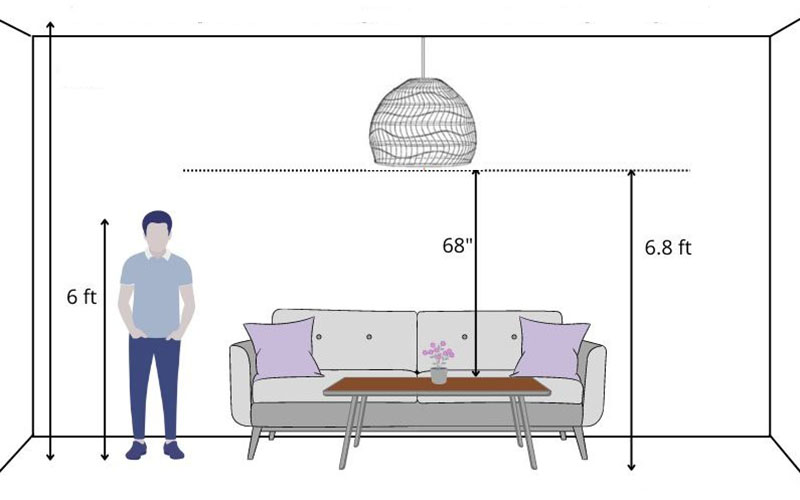
Recommended Pendant Light Heights by Room
One of the most common questions after learning how to install a pendant light fixture is: “How high should I hang it?” The correct pendant height depends on the room and purpose of the light. Installing at the right height ensures comfort, safety, and the perfect aesthetic balance.
| Room / Area | Recommended Height |
|---|---|
| Kitchen – Over Island | 30–36 inches above the countertop |
| Kitchen – Multiple Pendants | Space fixtures 15–30 inches apart |
| Dining Room – Over Table | 28–34 inches above the table surface |
| Living Room – General Lighting | Minimum 7 ft from the floor |
| Living Room – Accent Lighting | Vary heights for layered lighting |
| Bedroom – Bedside Pendants | 24–28 inches above the nightstand |
| Bedroom – Center Fixture | At least 7 ft from the floor |
| Outdoor / Balcony | Minimum 8 ft above the ground |
| Café / Restaurant – Tables | 30–36 inches above tabletops |
| Café / Restaurant – Bars & Counters | 36–42 inches above the counter |
Room-by-Room Notes
- Kitchen: The 30–36 inch rule is the standard for installing pendant lights over a kitchen island, ensuring task lighting without blocking views.
- Dining Room: Pendants should sit at or slightly above seated eye level to prevent glare.
- Living Room: Maintain clear headroom for walkways; use varied heights only for decorative or accent purposes.
- Bedroom: Lower-hanging pendants work well as bedside lighting, replacing traditional table lamps.
- Outdoor & Balcony: Safety comes first – always allow extra clearance and use weather-rated fixtures.
- Cafés & Restaurants: Consistent heights create comfort, while mixing styles adds warmth and character.
Pro Tip: A simple rule of thumb: larger tables or islands can handle lower-hanging or bigger pendants, while smaller spaces look best with compact designs hung slightly higher.
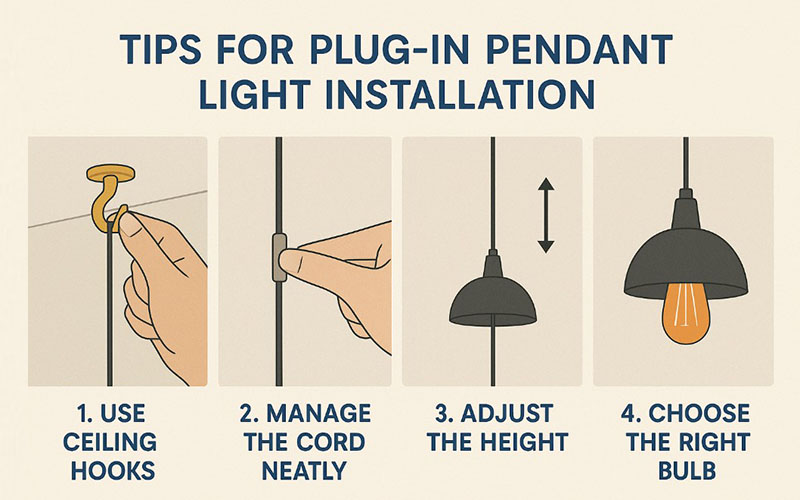
Tips for Plug-In Pendant Light Installation
Not all pendants need complicated wiring. If you’re searching how to hang a plug in pendant light, you’ll be glad to know this is one of the easiest DIY lighting projects. Plug-in pendants are versatile, renter-friendly, and perfect when you want extra lighting without rewiring your ceiling.
1. Use Ceiling Hooks
Secure ceiling hooks where you want the pendant to hang. Heavy fixtures may require multiple hooks or reinforced anchors.
2. Manage the Cord Neatly
Route the cord along the wall or ceiling using adhesive clips or cord covers. This prevents dangling cords and keeps your hanging light installation clean and safe.
3. Adjust the Height
Set the pendant at the correct level – the same height rules apply as in wired fixtures. Simply loop or shorten the cord as needed.
4. Choose the Right Bulb
Opt for dimmable LED bulbs to create ambiance. This small step makes your plug-in pendant light installation both energy-efficient and flexible.
Pro Tip: Plug-in pendants are perfect for renters or anyone who doesn’t want to commit to rewiring. They’re also a stylish solution for bedside lighting, home offices, or temporary setups like parties and events.
Troubleshooting Common Issues
Even if you follow every step of your pendant light installation, small problems may still occur. Here are the most common issues and how to fix them:
1. Light Not Turning On
- Double-check that the circuit breaker is on.
- Confirm that the bulb works by testing it in another fixture.
- Recheck your wiring connections – especially hot (black) and neutral (white).
This issue often arises when people first learn how to connect a pendant light.
2. Pendant Hanging Unevenly
- Adjust the chain or cord until the fixture is level.
- Ensure the ceiling bracket is securely mounted.
Uneven hanging is a common mistake in hanging light installation.
3. Excess Cord or Chain
- Trim the cord length (if safe to do so) or loop the excess neatly.
- Secure extra chain links at the ceiling plate.
4. Flickering Light
- Check that the bulb is compatible with the fixture and securely screwed in.
- If using dimmable bulbs, ensure your switch supports dimming.
5. Replacing an Old Pendant Light
If your fixture is faulty or outdated, you may need to know how to replace a pendant light or how to change pendant light. The process is simple: remove the old fixture, disconnect the wires, and follow the same installation steps with the new light.

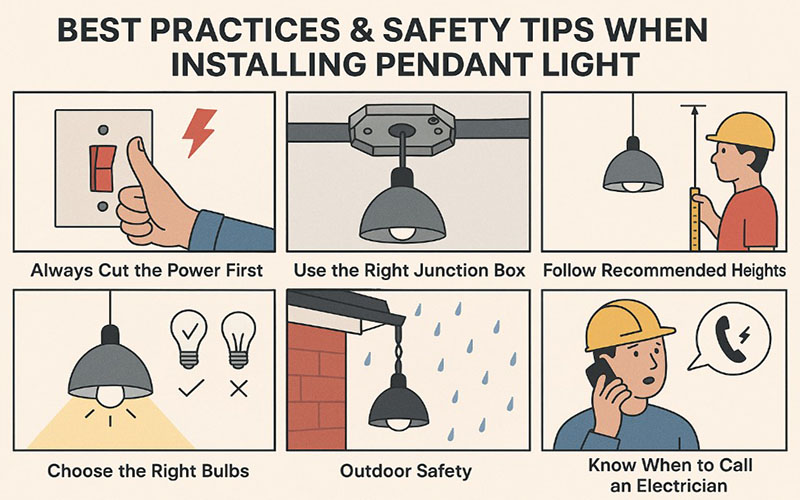
Best Practices & Safety Tips
Whether you’re figuring out how to hang a ceiling light or a pendant light, keeping safety in mind ensures both a stylish and secure result. Here are essential best practices:
1. Always Cut the Power First
Never start install pendant light fixture work without switching off the breaker and testing with a voltage tester.
2. Use the Right Junction Box
Heavy pendants require ceiling boxes rated for weight. If your light is large or multi-bulb, confirm that the box can handle it safely.
3. Follow Recommended Heights
Stick to the guidelines for each room to avoid glare or awkward placement. The correct height makes as much difference as the design itself.
4. Choose the Right Bulbs
LED bulbs are the best option for energy savings, dimming capability, and long lifespan.
5. Outdoor Safety
If you’re installing pendants outdoors, ensure they are UL-rated for damp or wet locations. Weatherproof sealing is a must.
6. Know When to Call an Electrician
If you’re unsure about wiring or working with older homes, it’s safer to hire a professional. DIY is rewarding, but electrical safety is non-negotiable.
FAQs: How to Install a Pendant Light
The process of pendant light installation is simple: turn off power, remove the old fixture, connect wires, mount the new pendant, adjust height, and test the light.
Follow the same steps as above. Ensure you have the right tools and a stable ladder. If you’re not comfortable with wiring, hire a professional electrician.
Yes. Learning how to replace a pendant light or how to change pendant light means simply removing the old fixture, disconnecting wires, and attaching the new pendant.
Match black (hot) to black, white (neutral) to white, and green/bare (ground) to ground. Use wire nuts and electrical tape. This is the most important part of how to install pendant light fixture correctly.
The installation steps are nearly identical. The main difference is pendant lights often have adjustable chains or cords, so height adjustment is key. That’s why guides on how to hang a ceiling light are very similar to pendant tutorials.
For kitchen islands, install pendants 30–36 inches above the countertop and space multiple fixtures 15–30 inches apart. This ensures even light coverage.
Plug-in pendants are easy to install: attach ceiling hooks, hang the light, route the cord along the wall with clips, and plug into an outlet. No electrical work is required.
Check the breaker, bulb, and wire connections. If everything looks correct but it still doesn’t work, you may need to redo the wiring or call an electrician.
Yes, but only with fixtures rated for outdoor use. Always check weatherproof certification before beginning any hanging light installation outside.
Loosen the cord or chain, set your desired length, then retighten. This is an easy fix if your pendant is hanging too low or too high.
Conclusion
Now you know exactly how to install a pendant light safely and efficiently. From gathering tools to wiring, mounting, and adjusting height, each step of pendant light installation helps transform your space with both style and functionality.
Whether you wanted to learn how to install a pendant light fixture, how to connect a pendant light, or simply how to replace a pendant light, this guide has covered everything you need. We’ve also explored how to install pendant lights over island in kitchens, how to hang a plug in pendant light for renters, and troubleshooting tips for common issues.
✨ With the right approach, pendant lighting can elevate your home’s atmosphere – from cozy bedside lamps to bold dining room centerpieces. If you’re not confident handling electrical wiring, don’t hesitate to call an electrician. Safety always comes first.
✅ Ready to upgrade your home with pendant lights?
Browse our lighting collection of modern, rustic, and handcrafted pendant lights to find the perfect style for your space. Each fixture is designed with care, blending functionality with design elegance – so your next installation will not only be safe but also stunning.
You may also like:


Read more articles
Best Rattan Large Dome Pendant Light Designs for Warm Natural Interiors
When a space calls for a pendant light with real presence – something that fills [...]
Jul
Bent Wood Slat Pendant Light Ideas for Natural Architectural Styling
The Bend Wood Slat Pendant Light collection represents a sophisticated evolution in natural material lighting [...]
Jul
Rattan Wood Top Pendant Light Ideas for Warm Organic Styling
The Rattan Wood Top Pendant Light collection combines the organic warmth of handwoven rattan with [...]
Jul
Best Nursery Lighting Ideas for a Warm, Safe Baby Room
When it comes to designing a cozy, soothing space for your baby, nursery lighting ideas [...]
Jul
Rattan Wide Brim Pendant Light Ideas for Effortless Organic Styling
The Rattan Wide Brim Pendant Light collection celebrates the beauty of wide, flat, organically shaped [...]
Jul
6 Stylish Rattan Stripe Pendant Lights That Elevate Any Space
The Rattan Stripe Pendant Light collection redefines natural pendant lighting with a bold design detail [...]
Jul
9 Best Rattan Color Band Pendant Light Designs for Unique Interiors
If you want a pendant light that combines the warmth of natural rattan with a [...]
Jul
Layered Rattan Multi-Tier Pendant Lights for Stunning Interiors
For interiors that demand something truly spectacular overhead, the Rattan Multi-Tier Pendant Light collection delivers. [...]
Jul
Best Rattan Ambient Pendant Light Designs for Soft Warm Lighting
When the goal is to create a space that feels genuinely warm, enveloping, and naturally [...]
Jul
How Rattan Spiral Pendant Light Elevate Your Room
If you are looking for a pendant light that doubles as a work of art, [...]
Jul
How Bamboo Knob Wide Pendant Lights Elevate Your Room
When you want a pendant light that truly fills a room with warmth and presence, [...]
Jul
Top Stylish Rattan Cone Pendant Lights That Warm Up Any Space
The Rattan Cone Pendant Light is one of the most enduring and beloved pendant light [...]
Jul
Explore our collections
Rattan Pendant Light
95 Products
Bamboo Pendant Light
38 Products
Fabric Pendant Light
41 Products
Wood Pendant Light
7 Products
Rope Pendant Light
14 Products
Rattan Wall Sconce
6 Products
Rattan Table Lamp
6 Products
Rattan Floor Lamp
9 Products