
Lighting Tips
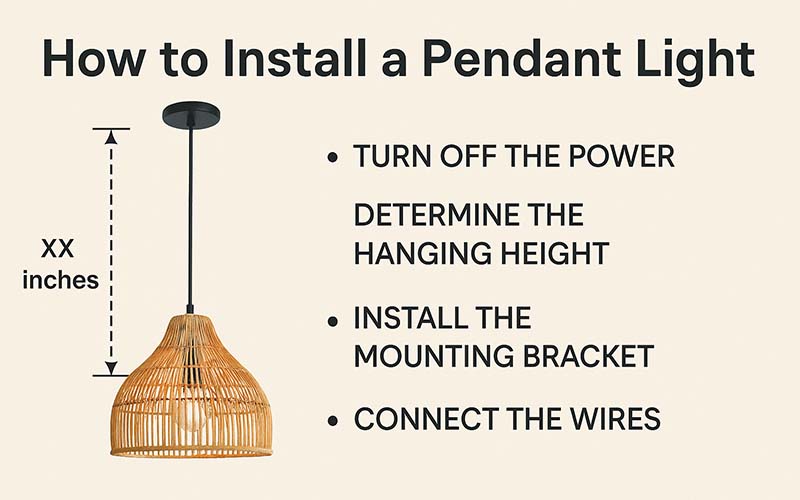
How to Install a Pendant Light: A Step by Step Guide
Pendant lights are a stylish and functional lighting solution that can enhance any space, from kitchens to dining areas and living rooms. Whether you’re looking to install a pendant light for the first time or change a pendant light to update your decor, this guide will walk you through the process safely and efficiently.
Tools & Materials Needed
Before you begin, gather the following tools and materials (depending on the location and installation method, some tools may not be necessary):
- Screwdriver
- Drill
- Wire strippers
- Voltage tester
- Electrical tape
- Ceiling bracket (if not included with the fixture)
- Ladder
- Pendant light fixture
- Light bulb
Step-by-Step Guide to Install a Pendant Light
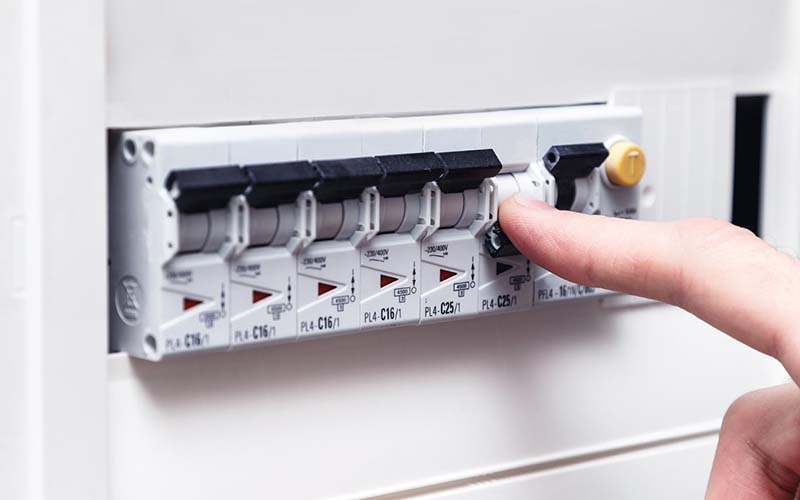
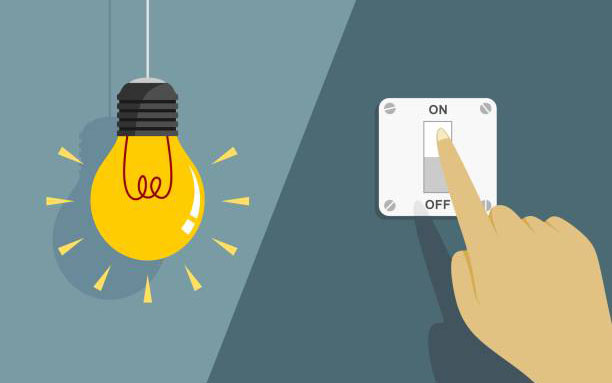
1. Turn Off the Power
Safety is the top priority when working with electrical wiring. Locate the breaker that controls the light fixture and turn it off. Use a voltage tester to ensure there is no power running to the wires.
2. Remove the Existing Light Fixture
If you need to change a pendant light, start by unscrewing and carefully lowering the old fixture. Disconnect the wires by loosening the wire nuts and separating the connections.
3. Install the Mounting Bracket (ceiling plate)
Most pendant lights come with a mounting bracket. Attach this bracket securely to the ceiling junction box using the provided screws. If your pendant light is heavy, make sure the ceiling box is rated for its weight. For lightweight fixtures like handcrafted rattan pendant light or fabric lights, simply hanging them with the electrical cord is sufficient.
NOTE: Some lights may require assembling parts and wiring connections beforehand.
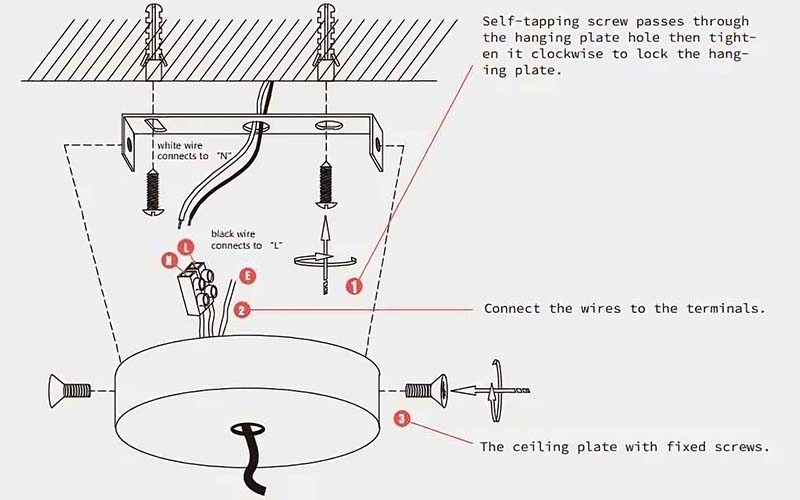
4. Connect the Wires
Match the wires from the pendant light to the corresponding wires in the ceiling:
- Black (or red) wire: Connects to the black (hot) wire in the ceiling.
- White wire: Connects to the white (neutral) wire.
- Green or bare copper wire (if available): Connects to the ground wire.
Twist the wires together using wire nuts and wrap them with electrical tape for extra security.
5. Attach and Adjust the Pendant Light
Secure the pendant light to the mounting bracket. If your fixture has an adjustable chain or cord, set the desired hanging height before tightening everything into place.
For those looking to hang a plug-in pendant light, simply mount the hook to the ceiling, plug the fixture into an outlet, and adjust the cord length as needed.
To achieve the perfect lighting effect, consider the recommended pendant light hanging heights for different spaces:
Kitchen
- Over a kitchen island: 30-36 inches above the countertop.
- For multiple pendant lights: Space them 15-30 inches apart for even illumination.
Dining Room
- Above a dining table: 28-34 inches above the table surface.
- The bottom of the pendant should be at or above eye level when seated to avoid glare.
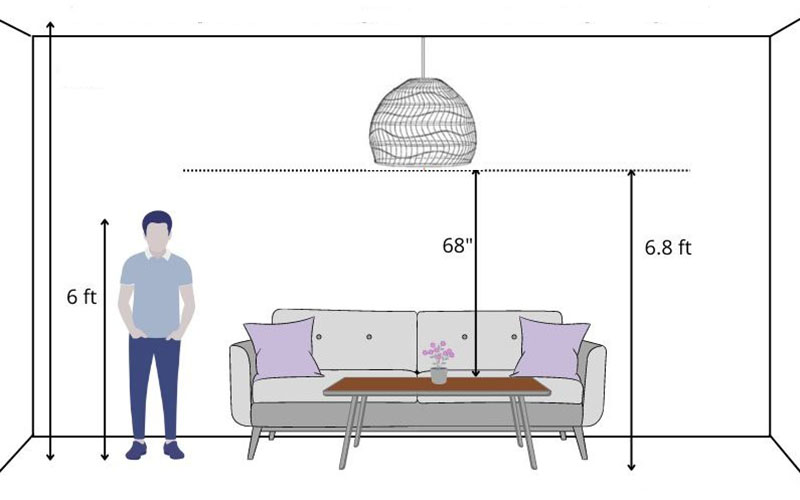
Living Room
- If used for general lighting: 7 feet from the floor to allow for clearance.
- For accent lighting: Position at different heights to create layers of light.
Bedroom
- Over bedside tables: 24-28 inches above the nightstand.
- Centered in the room: Ensure it’s at least 7 feet above the floor.
Balcony or Outdoor Spaces
- Ensure the fixture is at least 8 feet above the ground for safe clearance.
- Use weatherproof pendant lights if exposed to the elements.
Café or Restaurant
- Over tables: 30-36 inches above the table surface.
- Over counters or bars: 36-42 inches for optimal lighting and aesthetics.
- Mix different pendant styles to create a cozy and inviting ambiance.
6. Install the Light Bulb and Cover
Insert a compatible light bulb into the fixture and attach any decorative covers or shades that came with the pendant light.
7. Restore Power and Test the Light
Turn the circuit breaker back on and test the pendant light to ensure it is functioning correctly. If the light does not turn on, double-check the wiring connections and make sure the bulb is properly installed.
Tips for Hanging a Plug-In Pendant Light
- Use ceiling hooks to support the weight of heavier lamps.
- Route the cord along the wall using adhesive clips for a neat appearance.
- Choose a dimmable bulb for adjustable lighting ambiance.
Troubleshooting Common Issues
- Light not turning on: Ensure the power is on, the bulb is working, and the wiring connections are secure.
- Pendant light hanging unevenly: Adjust the chain or cord length until the fixture is level.
- Excess cord or chain: Trim the excess length for a cleaner look and secure any extra cord.
Final Thoughts
The article has guided you on How to Install a Pendant Light. Whether you are installing a new pendant light or replacing an old fixture, following these steps will help ensure a safe and successful installation. If you are unsure about handling electrical wiring, consider hiring a licensed electrician to assist with the job.
By taking the time to install a pendant light correctly, you can transform your space with beautiful, functional lighting. Happy decorating!
See more: How to install light fixture – Key Things to Consider


Unlock VIP Perks
Join as a priority member to receive gifts and be the first to access exclusive deals, our newest collections, and more...
Read More
Recessed Lighting Installation Cost in 2025: Money-Saving Tips
Recessed lighting installation cost is one of the first things homeowners consider when planning to [...]
Jun
How to Change Recessed Lighting: Step-by-Step Guide
Recessed lighting – often referred to as can lights, pot lights, or downlights – is [...]
Jun
How Many Recessed Lights Do I Need? Expert Guide to Perfect Lighting Layout
One of the most common questions homeowners ask when planning lighting is: “How many recessed [...]
Jun
How to Install Recessed Lighting: Everything You Need to Know
How to Install Recessed Lighting is a common question among homeowners looking to upgrade their [...]
Jun
Best Bathroom Pendant Light Ideas to Elevate Your Space
When it comes to bathroom design, lighting plays a crucial role in setting the mood, [...]
Jun
Best Hotel Lighting Ideas That Will Wow Your Guests
Lighting plays a vital role in shaping the guest experience in any hospitality setting. From [...]
Jun
25+ Modern Farmhouse Lighting Ideas Illuminate Your Home
When it comes to home decor, lighting plays a crucial role in setting the mood, [...]
Jun
How to Remove a Light Fixture Safely and Easily?
Whether you’re replacing an outdated ceiling light, troubleshooting electrical issues, or simply giving your room [...]
Jun
Product Collection
Rattan Pendant Light
86 Products
Bamboo Pendant Light
56 Products
Fabric Pendant Light
44 Products
Wood Pendant Light
9 Products
Rope Pendant Light
8 Products
Rattan Table Lamp
6 Products
Wabi Sabi Pendant Light
39 Products
Rattan Wall Sconce
5 Products