
Lighting Guides & Tips
How to Remove a Light Fixture Safely and Easily?
Whether you’re replacing an outdated ceiling light, troubleshooting electrical issues, or simply giving your room a fresh look, knowing how to remove a light fixture safely and efficiently is essential. Many homeowners hesitate to touch ceiling lights or light covers, fearing they’ll break something – or worse, get shocked. Fortunately, removing most light fixtures is a fairly straightforward task if you follow the right steps.
In this comprehensive guide, we’ll walk you through:
- How to remove a ceiling light fixture
- How to remove various types of ceiling light covers (with or without screws)
- Safety tips and common mistakes to avoid
- What to do if your light fixture or cover won’t come off
After removing the existing light, see our complete guide on How to Install a Light Fixture for proper and safe installation.
Safety Precautions Before You Begin
Before we dive into the actual steps, safety should always come first. Working with electricity requires caution, and taking a few extra minutes to prepare can save you from serious accidents.
- Turn Off the Power Completely: Simply flipping the wall switch isn’t enough. Always shut off power at the circuit breaker that controls the light fixture. After switching it off, double-check by trying to turn the light on to confirm it’s no longer receiving power.
- Use a Voltage Tester: Before you touch any wires, use a non-contact voltage tester to make sure there’s no live electricity running through the fixture. This simple tool adds an extra layer of protection.
- Wear Safety Gear: Put on insulated work gloves to protect yourself from accidental shocks, and use protective eyewear if you’re removing glass covers or fragile parts.
- Secure a Stable Ladder: Most ceiling fixtures are positioned overhead, so you’ll need a step ladder. Choose one that’s sturdy and tall enough to reach the light comfortably without stretching.
- Know When to Call a Professional: If the fixture is extremely heavy (like a large chandelier), or if the wiring looks outdated or damaged, it’s better to hire a licensed electrician. Safety should never be compromised.
By following these precautions, you’ll create a safe work environment and be fully prepared for the removal process. Once these basics are covered, you can confidently move on to gathering the right tools and supplies for the job.

Tools and Supplies You May Need
Before starting, it’s best to gather all the necessary tools and supplies. Having everything ready will make the process smoother and prevent unnecessary trips in the middle of the job. Here’s what you’ll need:
- Screwdrivers (Phillips and Flat-Head) – to loosen screws on light covers, mounting brackets, or wire connectors.
- Voltage Tester – to ensure no live electrical current is running to the fixture before you touch the wiring.
- Wire Cutters/Strippers – helpful for disconnecting or trimming electrical wires if needed.
- Insulated Work Gloves – protect your hands from shocks and sharp edges.
- Protective Eyewear – keeps your eyes safe when removing glass covers or dusty fixtures.
- Step Ladder – sturdy and tall enough to let you reach the ceiling comfortably.
- Electrical Tape & Wire Nuts – for capping off exposed wires if you don’t plan to install a new fixture right away.
- Container for Screws and Parts – a small bowl or zip bag to keep track of screws, nuts, and clips.
Having these supplies on hand ensures you won’t get stuck halfway through the process, especially when dealing with delicate flush mount ceiling lights, chandeliers, rattan lights, or bamboo lights.

Step-by-Step Guide to Remove a Light Fixture
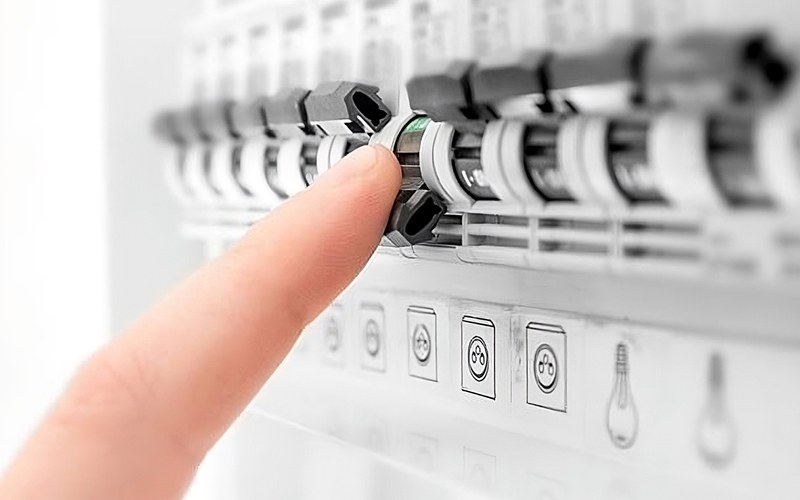
Step 1: Turn Off the Power
The most important step in removing any light fixture is to cut off the power supply. Electricity is invisible but dangerous, and failing to disconnect it properly can result in serious injury.
Locate the Circuit Breaker Panel
- Find the breaker that controls the room where the light fixture is installed.
- Flip the switch to the “OFF” position.
Double-Check at the Switch
- After turning off the breaker, test the light switch in the room.
- If the light doesn’t turn on, it means the power has been cut.
Confirm with a Voltage Tester
- Use a non-contact voltage tester by holding it near the fixture’s wires or switch.
- If the tester does not beep or light up, the fixture is safe to touch.
Post a Warning (Optional but Recommended)
- If you live with others, place a note on the breaker panel so no one accidentally flips the switch back on while you’re working.
Taking time to ensure the power is completely off gives you a safe starting point for the rest of the removal process. Once this step is done, you’re ready to move on to removing the ceiling light cover.
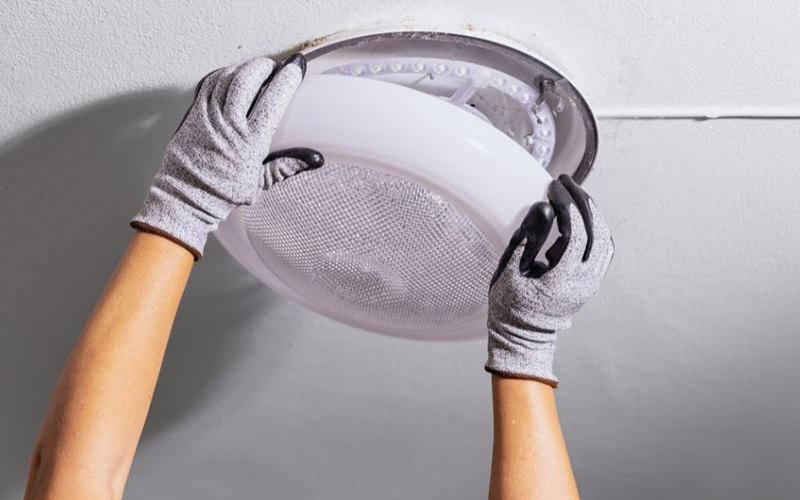
Step 2: Remove the Ceiling Light Cover
Once the power is safely turned off, the next step is to remove the ceiling light cover. Different fixtures use different types of covers, so the removal method can vary.
1. Glass Globe Covers
- Many traditional ceiling lights use a glass globe held in place by screws or clips.
- How to remove: Hold the globe with one hand while gently loosening the screws or clips with the other. Carefully lower the glass and set it on a soft surface to avoid breakage.
2. Flush Mount Ceiling Light Covers (No Screws)
- Some flush mount lights don’t use visible screws; instead, they twist or snap into place.
- How to remove: Gently twist the cover counterclockwise or push up slightly and turn until it loosens. If it has spring clips, press them carefully to release the cover.
3. Square or Plastic Covers
- Square or plastic light covers are common in bathrooms, kitchens, and hallways.
- How to remove: Use a flat-head screwdriver to gently pry open the clips or tabs. Be careful not to crack the plastic.
👉 Pro Tip: Place a blanket or towel underneath your work area in case a cover slips and falls. This will help prevent glass breakage and scratches on your floor.
Step 3: Unscrew the Fixture from the Ceiling
With the cover removed, you’ll see the fixture’s base or mounting plate attached to the ceiling. This is usually held in place with screws or bolts.
Support the Fixture
- Before loosening any screws, use one hand to support the light fixture.
- For heavier fixtures like chandeliers or farmhouse-style lanterns, it’s best to have a second person help.
Locate the Mounting Screws
- Most fixtures are secured with two or more screws that attach the base to the electrical box in the ceiling.
- Use the appropriate screwdriver (Phillips or flat-head) to remove them.
Lower the Fixture Slowly
- Once the screws are removed, gently lower the fixture a few inches.
- This will expose the electrical wiring inside the ceiling box.
👉 Safety Note: The fixture will still be connected to the electrical wires. Do not pull or tug hard – move carefully so you don’t damage the wiring.

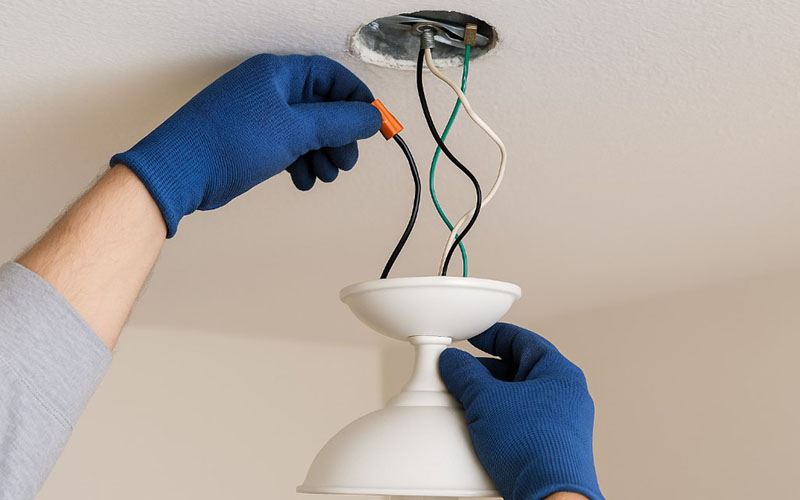
Step 4: Disconnect the Electrical Wiring
At this stage, your light fixture is hanging loosely from the ceiling, still attached to the electrical wires. Disconnecting these wires is a crucial step, and it must be done with care.
Identify the Wires
Typically, you’ll see three types of wires:
- Black (or red) – hot wire.
- White – neutral wire.
- Green or bare copper – ground wire.
In older homes, the color coding may vary, so proceed cautiously.
Remove the Wire Nuts
- Most fixtures use plastic caps (called wire nuts) to connect the wires.
- Hold the wires together firmly and unscrew the wire nut counterclockwise.
- Once removed, gently separate the fixture’s wires from the house wiring.
Cap or Tape the House Wires
- If you’re not installing a new fixture right away, use wire nuts or electrical tape to safely cover the exposed house wires.
- This prevents accidental contact or electrical hazards.
Detach the Ground Wire
- Unscrew the ground wire (green or copper) from the mounting bracket or box if it’s attached with a screw.
👉 Pro Tip: Take a photo of the wiring setup before disconnecting. This makes installing a new light fixture much easier later on.
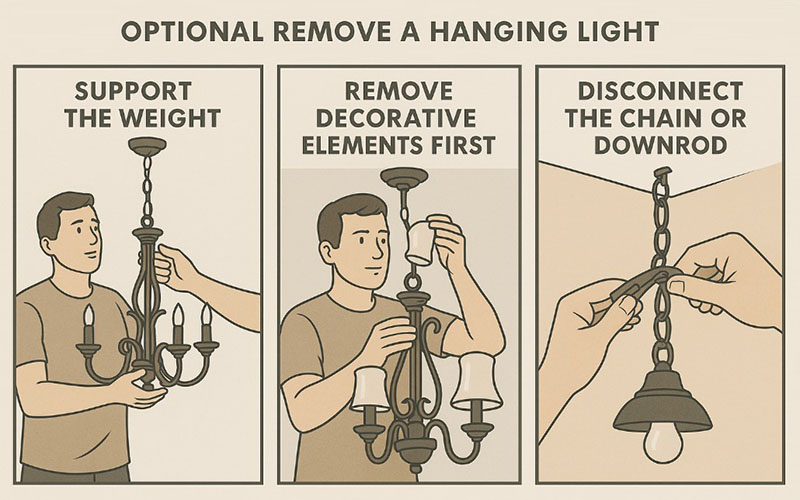
Optional: How to Remove a Hanging Light Fixture (Chandelier or Pendant)
Hanging fixtures like chandeliers, pendant lights, or farmhouse lanterns require extra care because of their size and weight.
Support the Weight
- Have someone help hold the chandelier or pendant while you disconnect it.
- For large or heavy fixtures, you may want to use a temporary hook or rope to support the weight as you work.
Remove Decorative Elements First
- Take off glass shades, crystals, or bulbs before loosening the main fixture.
- This reduces weight and prevents breakage.
Disconnect the Chain or Downrod
- Chandeliers and pendants are often suspended by a chain, rod, or cord.
- Use pliers to open chain links or unscrew threaded rods carefully.
Lower the Fixture and Disconnect Wires
- Once the suspension system is free, gently lower the fixture.
- Follow the same wiring steps as above: remove wire nuts, separate the wires, and secure the house wiring.
👉 Safety Note: Large chandeliers can be very heavy and awkward to handle. If you don’t feel comfortable, it’s best to hire an electrician for this step.
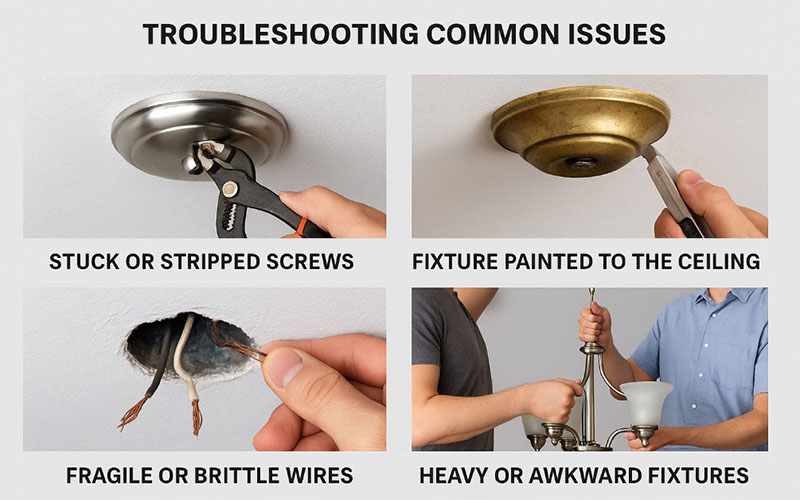
Troubleshooting Common Issues
Even with careful preparation, you may run into a few challenges while removing a light fixture. Here are some common problems and how to handle them:
Stuck or Stripped Screws
- Over time, screws can become rusted or stripped.
- Try using a penetrating oil to loosen rust or switch to a screwdriver with a better grip. In extreme cases, use pliers to turn the screw.
Fixture Painted to the Ceiling
- Older fixtures are sometimes sealed to the ceiling with layers of paint.
- Use a utility knife to carefully cut around the base and break the paint seal before pulling down the fixture.
Fragile or Brittle Wires
- In older homes, wires can be stiff, frayed, or brittle.
- If you notice damaged wiring, stop and consult an electrician before continuing.
Heavy or Awkward Fixtures
- Chandeliers, wagon wheel lights, or oversized farmhouse pendants can be difficult to manage alone.
- Always have a second person assist when handling heavy or awkward pieces.
By anticipating these issues, you’ll be better prepared to complete the job safely without unnecessary frustration.
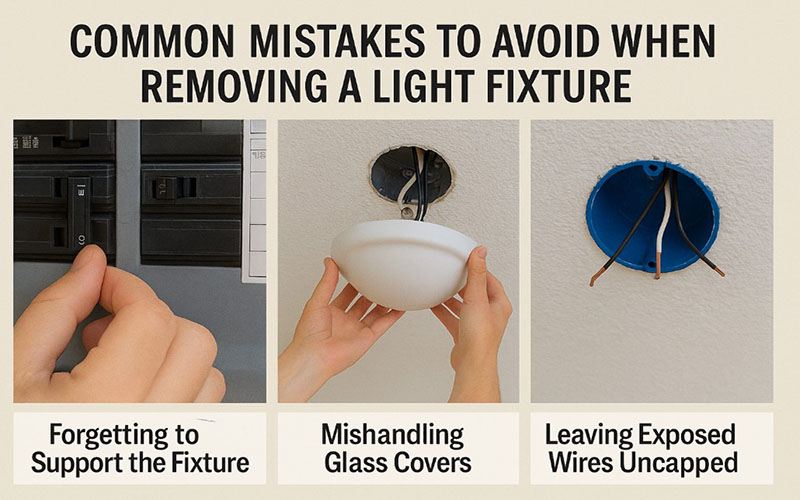
Common Mistakes to Avoid
Removing a light fixture may seem straightforward, but rushing or skipping steps can lead to serious problems. Here are the most common mistakes homeowners make – and how to avoid them:
- Not Turning Off the Breaker: Relying on the wall switch alone is dangerous. Always cut power at the breaker and verify with a voltage tester.
- Forgetting to Support the Fixture: Unscrewing a fixture without supporting its weight can cause it to fall, damaging both the light and your ceiling.
- Mishandling Glass Covers: Glass globes and shades can slip easily. Always hold them securely with one hand while loosening screws with the other.
- Leaving Exposed Wires Uncapped: After disconnecting, never leave bare wires exposed. Use wire nuts or electrical tape to secure them safely.
- Skipping Safety Gear: Working without gloves, eyewear, or a stable ladder increases the risk of injury.
Avoiding these mistakes will make your project smoother, safer, and more professional.
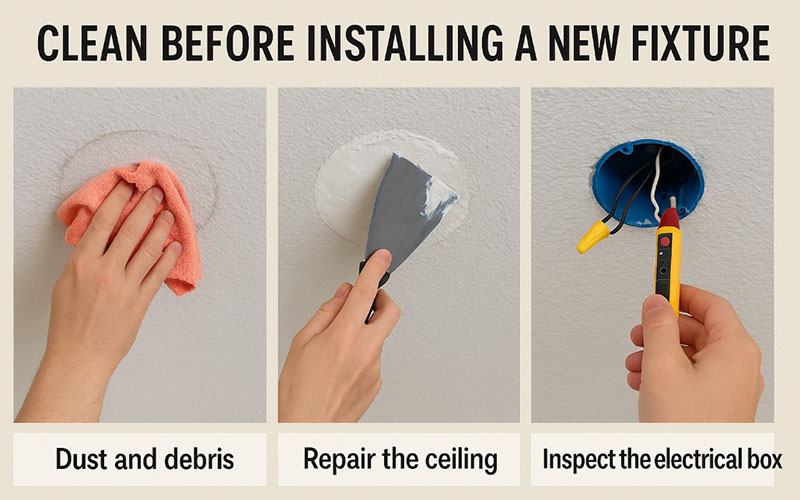
Bonus Tip: Clean Before Installing a New Fixture
Once your old light fixture is removed, it’s the perfect time to freshen up the area before installing a new one. Dust and grime often collect around ceiling mounts, so a quick cleanup will make your new fixture look even better.
- Dust and Debris: Wipe away any dirt, cobwebs, or residue left behind by the old fixture.
- Ceiling Touch-Ups: If the old fixture left behind marks, stains, or paint chipping, take a moment to patch and repaint the ceiling for a polished look.
- Check the Electrical Box: Make sure the ceiling box is secure and in good condition. Replace it if it feels loose or outdated.
👉 This small step ensures your modern farmhouse chandelier or pendant fixture installs onto a clean and safe surface, enhancing both style and durability.
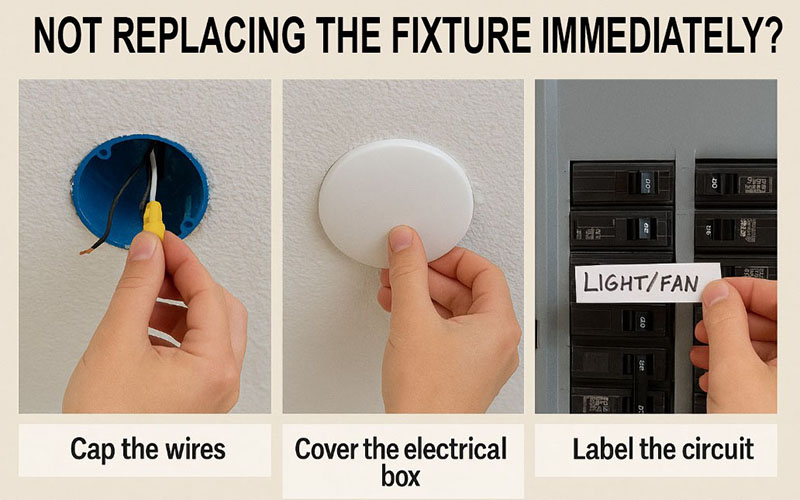
Aftercare: What to Do If You’re Not Replacing the Fixture Immediately
If you’re not planning to install a new fixture right away, it’s important to leave the area safe and protected. Exposed wires and open ceiling boxes can be hazardous if not handled properly.
Cap the Wires
- Secure all exposed wires with wire nuts. For extra protection, wrap them with electrical tape.
- This prevents accidental shocks and keeps the wires from touching each other.
Cover the Electrical Box
- Use a blank ceiling plate or electrical box cover to safely seal the opening.
- This keeps dust, insects, and moisture out while ensuring compliance with electrical safety standards.
Label the Circuit
- If you plan to leave the box unused for a while, label the breaker switch in your panel so you (or anyone else in your household) can quickly identify the correct circuit later.
👉 By taking these precautions, you’ll maintain a safe environment until you’re ready to install a new fixture – whether it’s a simple flush mount or a stylish farmhouse pendant light.
Planning to Replace the Fixture?
Once you’ve successfully removed your old fixture, it’s time to think about what comes next. Choosing the right replacement can transform your space and update the entire look of a room. Here are a few popular options to consider:
- Farmhouse Chandeliers: Perfect for dining rooms or entryways, these oversized lights add rustic charm with modern elegance.
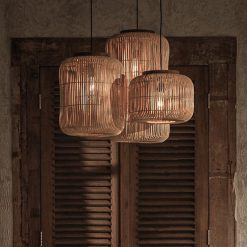
- Pendant Lights: Great for kitchen islands, breakfast nooks, or hallways. A set of two or three pendants provides both style and functionality.
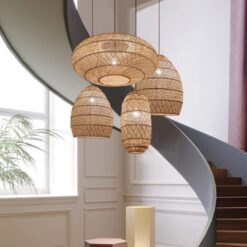
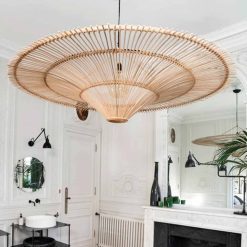
- Rattan Lights: Handwoven designs bring warmth, texture, and a natural vibe. These are especially popular in farmhouse, coastal, or bohemian-inspired spaces.
- Bamboo Lights: Lightweight and eco-friendly, bamboo fixtures are ideal for those who love sustainable décor. They work beautifully in kitchens, patios, or living rooms.
- Flush Mounts & Semi-Flush Mounts: Best for low ceilings or compact areas like bathrooms and closets, while still offering farmhouse or modern styling.
👉 Pro Tip: Before installing a new light, make sure the electrical box can support the weight of your chosen fixture. For heavy chandeliers, you may need a reinforced box.


Rattan Pendant Light
Vintage Rattan Pendant Light Fixture High Quality Lamp Shades

Rattan Pendant Light


Rattan Pendant Light

Rattan Pendant Light

Rattan Pendant Light
Frequently Asked Questions (FAQ)
1. Can I remove a light fixture without turning off the breaker?
No. Always turn off the power at the breaker before working with any electrical fixture. Relying only on the wall switch is unsafe.
2. How do I remove a flush mount ceiling light with no visible screws?
Most flush mounts twist counterclockwise or use hidden spring clips. Gently push up and rotate until the cover loosens.
3. What safety gear should I use?
Insulated gloves, protective eyewear, and a sturdy ladder are highly recommended. A voltage tester is also essential for checking live wires.
4. How long does it take to remove a light fixture?
For a standard flush mount or globe light, it usually takes about 15–30 minutes. Chandeliers or large farmhouse fixtures may take longer.
5. Do I need an electrician to remove a chandelier?
If the chandelier is heavy, awkward to handle, or connected to outdated wiring, it’s best to hire a licensed electrician.
6. Can rattan lights or bamboo lights be used outdoors?
Yes, but only if the fixture is rated for damp or wet locations. For covered patios or porches, always choose UL-listed outdoor models.
7. What should I do if I’m not installing a new fixture immediately?
Cap all exposed wires with wire nuts, wrap them with electrical tape, and cover the ceiling box with a blank plate for safety.
Final Thoughts
Learning how to remove a light fixture is a valuable DIY skill that can save you time and money. By following safety precautions, using the right tools, and working step by step, you can remove almost any type of fixture – whether it’s a flush mount, chandelier, or handwoven rattan pendant.
Once the old fixture is gone, you’ll have the perfect opportunity to refresh your home with a stylish upgrade, bringing in more light, personality, and charm to your space.
You may also like:


Unlock VIP Perks
Join as a priority member to receive gifts and be the first to access exclusive deals, our newest collections, and more...
Read more articles
25+ Best Outdoor Bamboo Pendant Lights for a Warm, Natural & Inviting Space
Outdoor bamboo pendant lighting transforms a pergola, patio, or covered garden dining space from a [...]
Jun
11 Best Organic Modern Rope Lighting Ideas for a Warm, Inviting Space
Wicker, hemp rope, jute, and water hyacinth bring the most authentically textural and the most [...]
Jun
25+ Trending Organic Modern Rattan Lights for a Cozy Living Space
The most beautifully designed organic modern interiors today are built not on safe pendant choices [...]
Jun
8 Organic Modern Rattan Dome Pendant Lights for a Soft, Natural Interior
The dome form is rattan’s most naturally generous and most softly organic pendant silhouette – [...]
Jun
9 Organic Modern Rattan Chandeliers for a Soft, Natural Interior
A rattan chandelier in an organic modern interior creates the most complete expression of what [...]
Jun
11 Organic Modern Brown Rattan Lights for a Warm, Earthy Home
Brown rattan brings the most warmly grounded and most gently earthy pendant tone to an [...]
May
15+ Organic Modern Black Rattan Lights for a Warm, Bold Home
Black rattan in an organic modern interior creates a precisely beautiful design tension – the [...]
May
12 Organic Modern Beige Rattan Lights for a Natural Interior
Beige rattan is the pendant material that organic modern design was made for – its [...]
May
25+ Organic Modern Bamboo Lights for a Soft, Natural Interior
Organic modern design lives at the most beautiful intersection of clean contemporary form and warm [...]
May
8 Best Organic Modern Wood Pendant Lights for a Warm, Natural Home
Wood pendant lighting brings a quality to an organic modern interior that no softer natural [...]
May
8 Modern Rustic Wood Lighting for a Warm, Architectural Interior
Wood pendant lighting belongs in a modern rustic interior the way exposed timber belongs in [...]
May
12 Modern Rustic Wicker Rope Pendant Lights for a Warm, Textural Interior
In a modern rustic interior built around exposed timber beams, rough stone walls, worn leather [...]
May
Explore our collections
Rattan Pendant Light
95 Products
Bamboo Pendant Light
38 Products
Fabric Pendant Light
41 Products
Wood Pendant Light
7 Products
Rope Pendant Light
14 Products
Rattan Wall Sconce
6 Products
Rattan Table Lamp
6 Products
Rattan Floor Lamp
9 Products